Integrate CRM to Dynamics 365 Business Central with Microsoft Flow
Published on September 9, 2019
To access details on finance, stock inventory & processing orders, integrate CRM with Business Central using Microsoft Flow. Microsoft Flow is a cloud based service which connects one or more applications or services for;
- Moving data
- Getting notifications
- Collecting data
- Creating data
- Scheduling event or task
- Sending email
There are already predefined templates and connectors in MS Flow to achieve the integration between CRM & Business Central. When the created flow is successful, it can be converted into a template.
Steps to integrate CRM with Dynamics 365 Business central
To integrate CRM with Business Central, log into CRM, Dynamics 365 Business Central and Microsoft Flow (with CRM login credentials). The accounts table in CRM denotes the customer table in Business central.
- From the list of connectors available in Microsoft Flow, select the Dynamics 365 connector (denotes CRM)
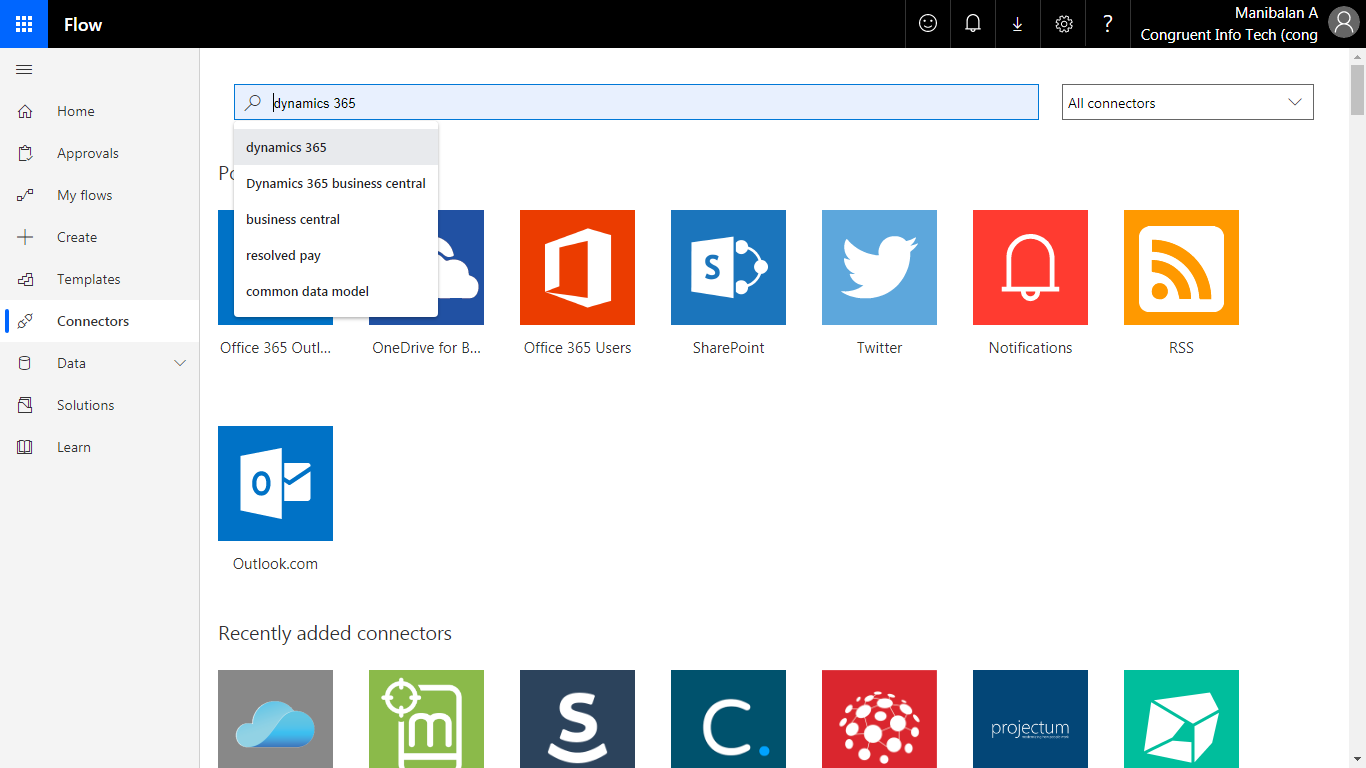
- Use the predefined trigger to create/delete and update to start the trigger action
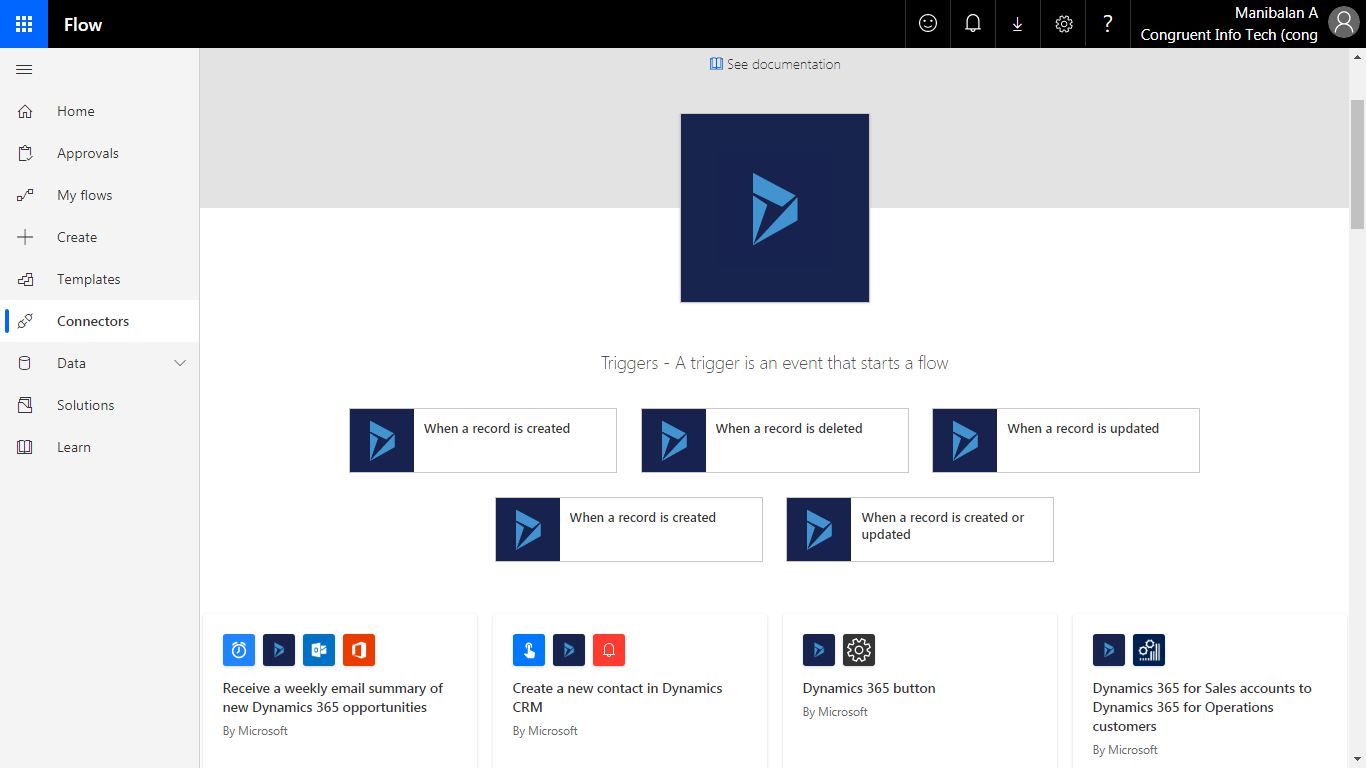
- Choose the organisation and entity name in the trigger section
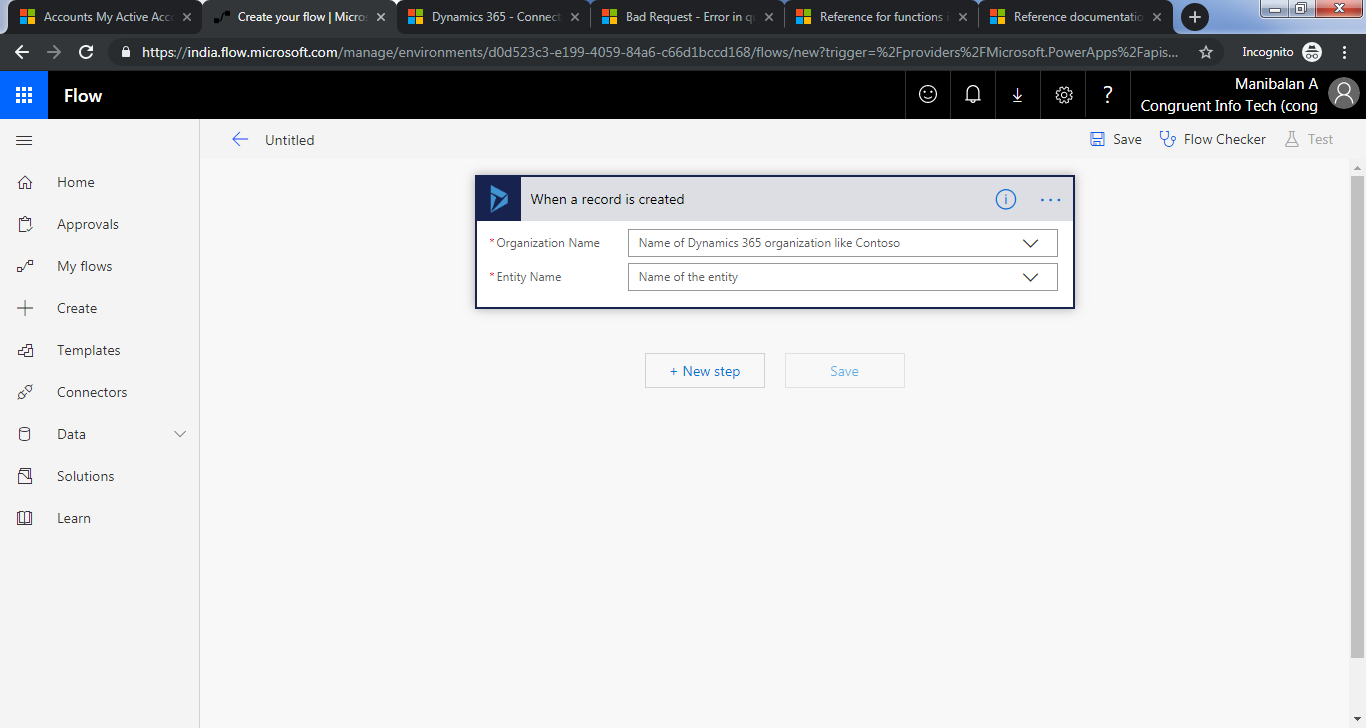
- Choose next step and search for any other connector to act as repository. For this sample, Common data services (CDS) is chosen to act repository or intermediator
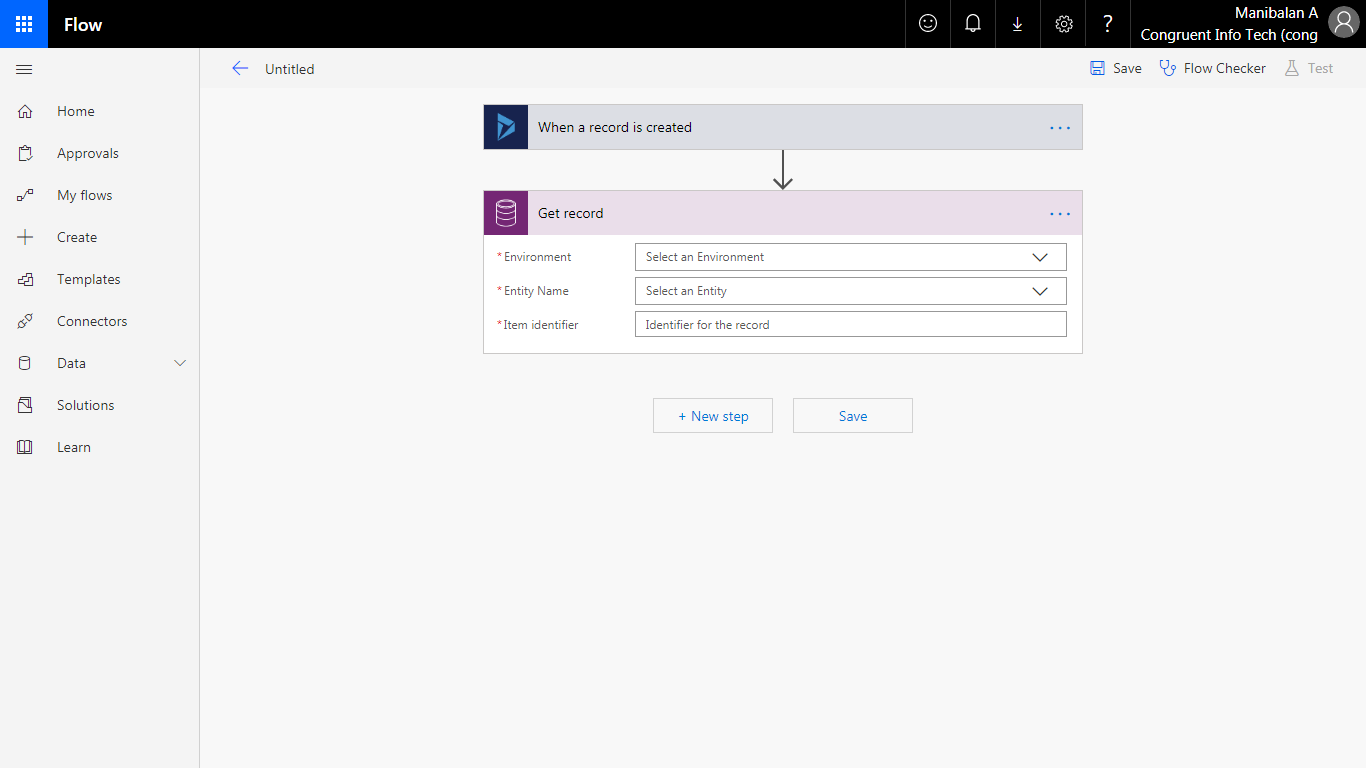
- Select the action to be performed by the CDS either to create/list/update/delete action to be performed by the repository. Choose ‘Get record’ to create the record or to retrieve the record from the Dynamics 365 system
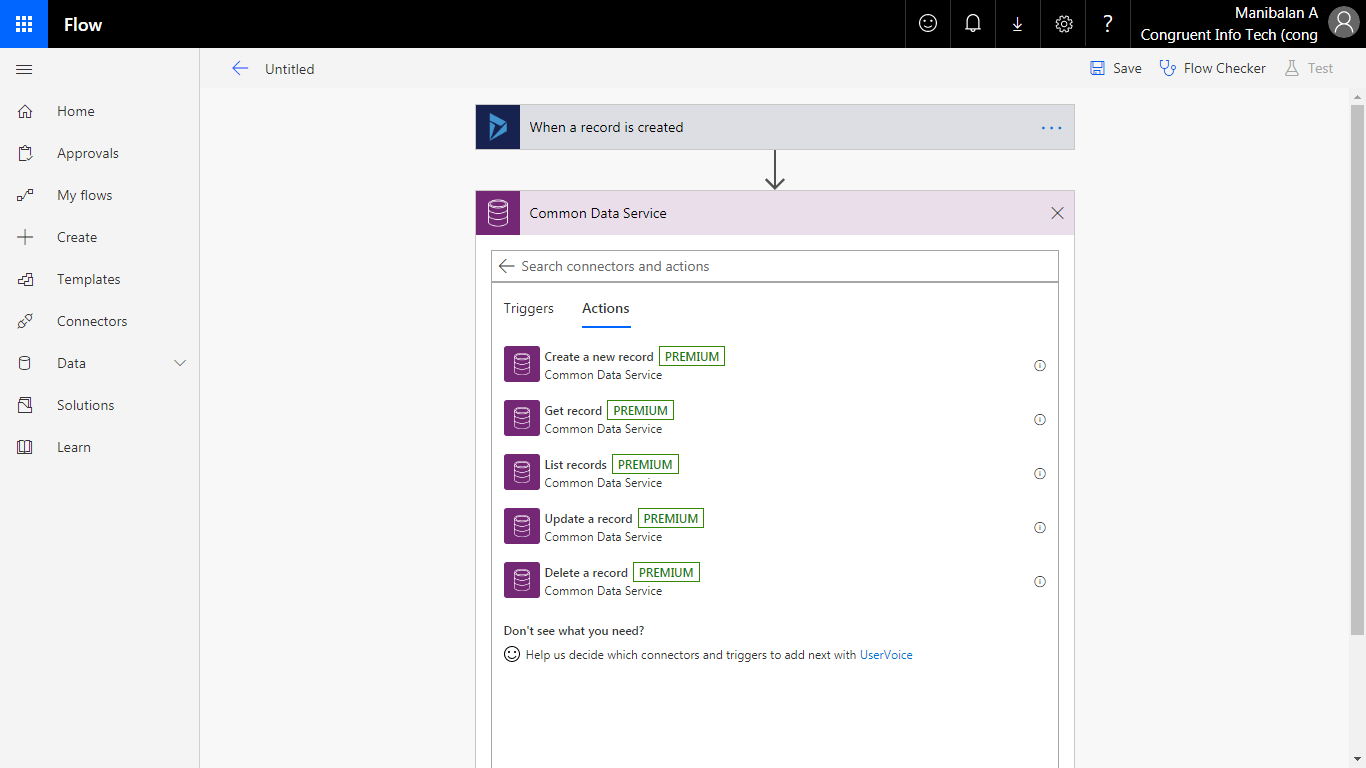
- Enter the environment, entity name and item identifier for the record received from Dynamics 365 system
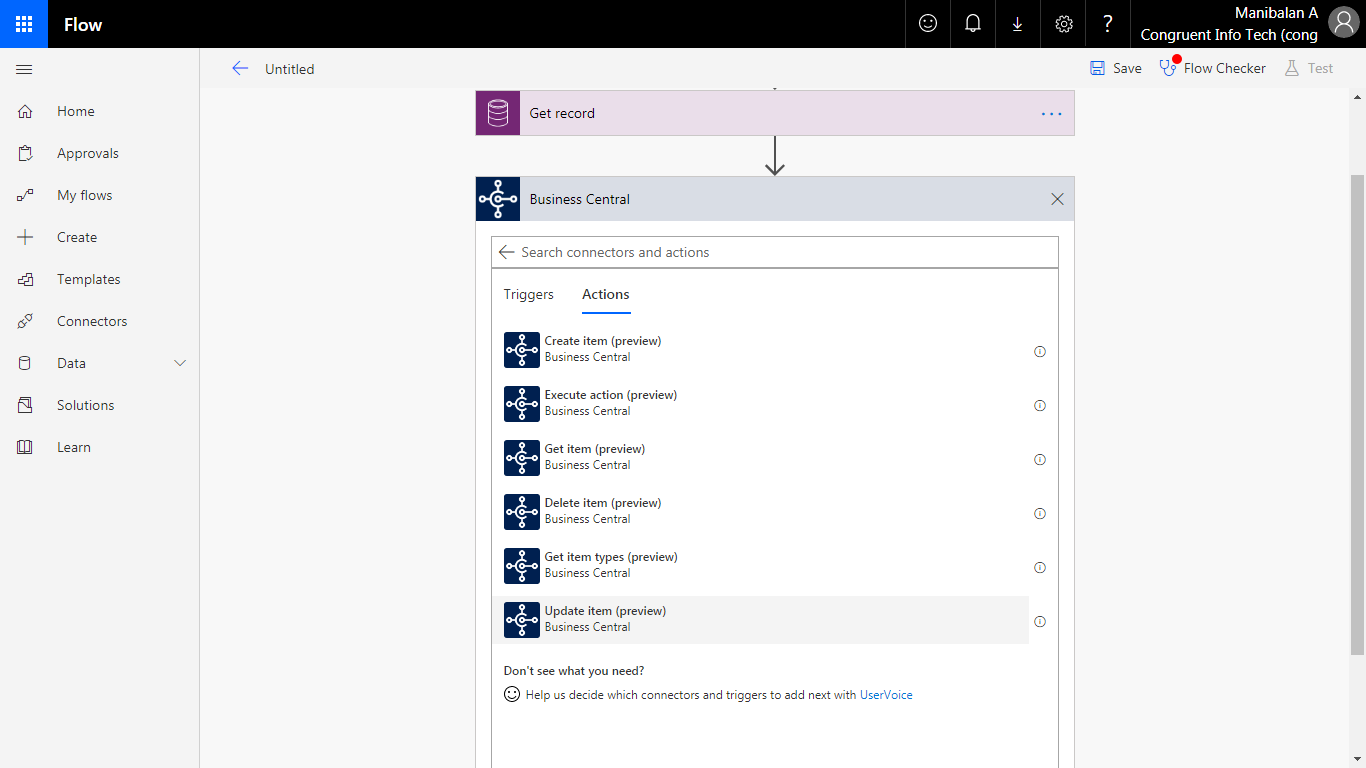
- Choose ‘Business Central’ as the final action to be performed by Microsoft Flow
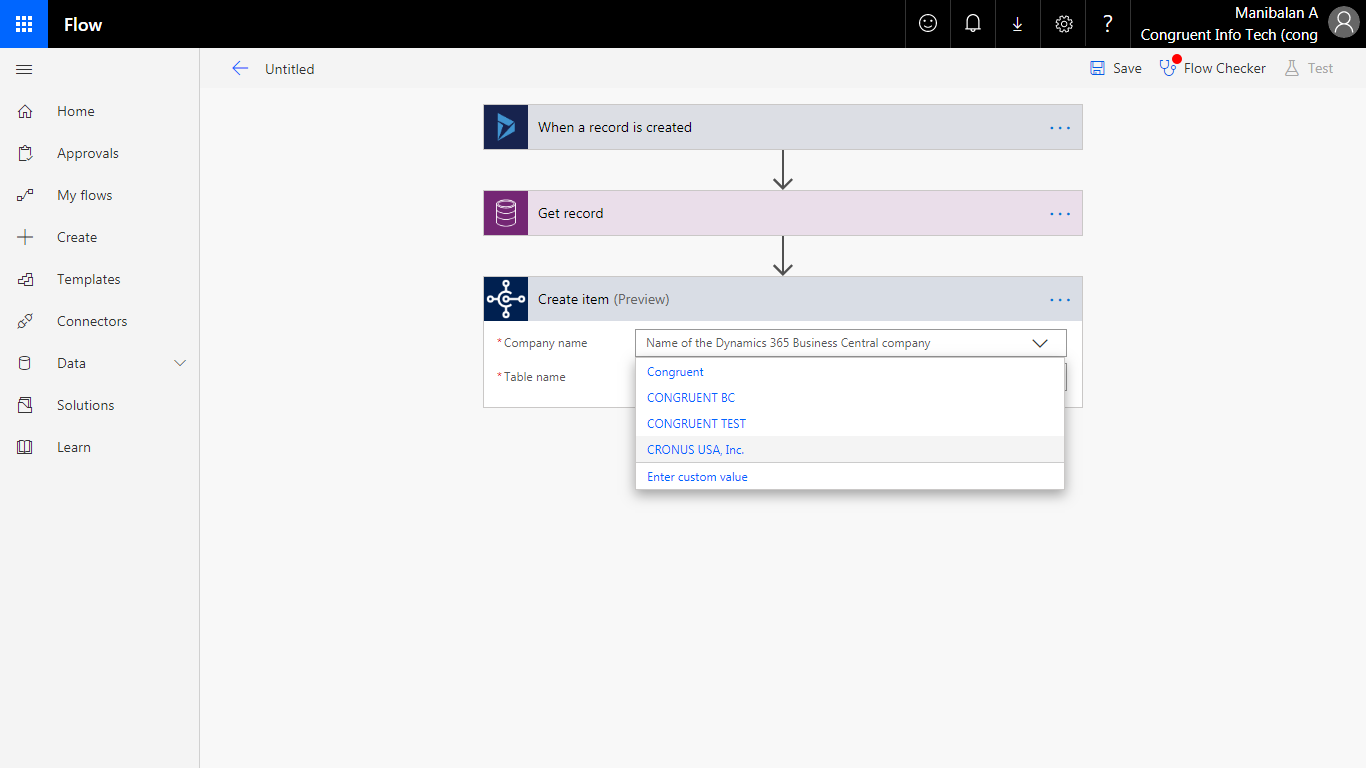
- To access the record from CRM to Business Central, choose ‘Create item’ action
- Enter the organisation name and table name in their respective fields
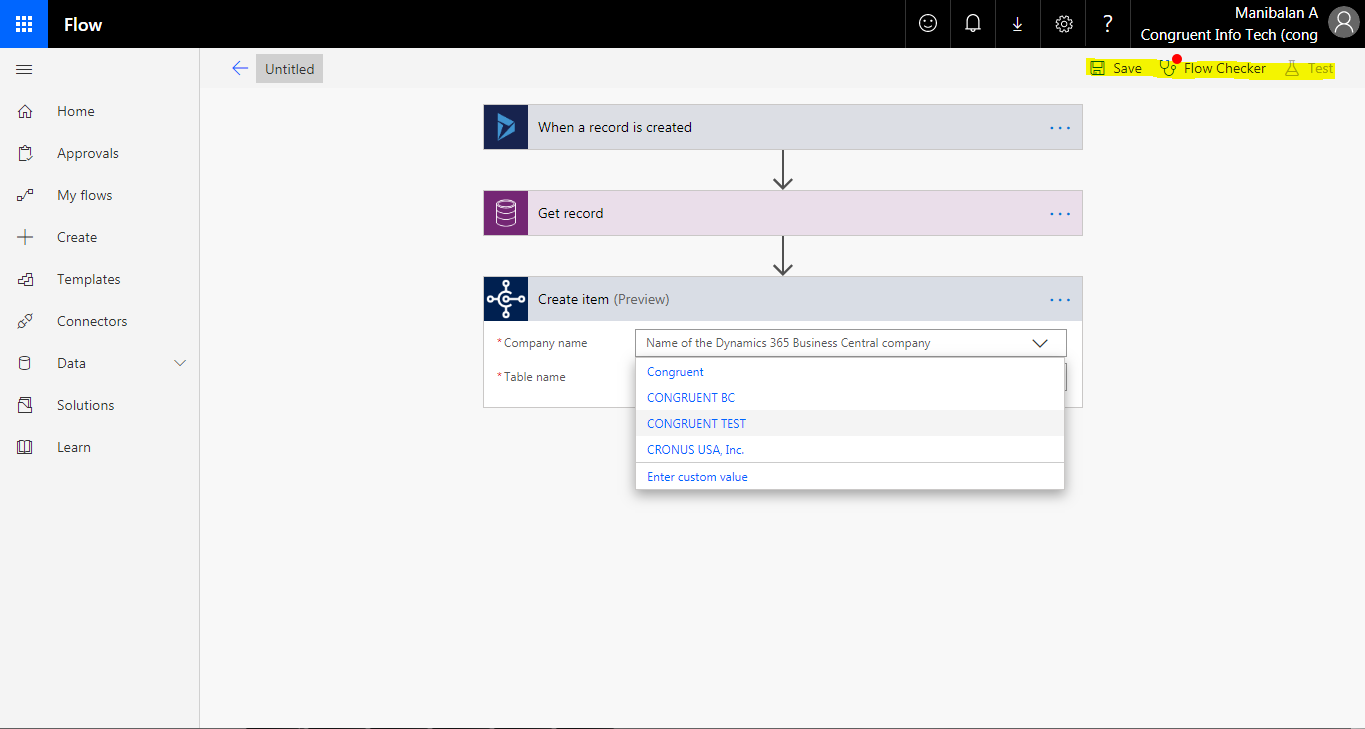
- Check the created flow by clicking on flow checker in the ribbon for errors and warnings. Once the flow checker is done, save and test the flow.
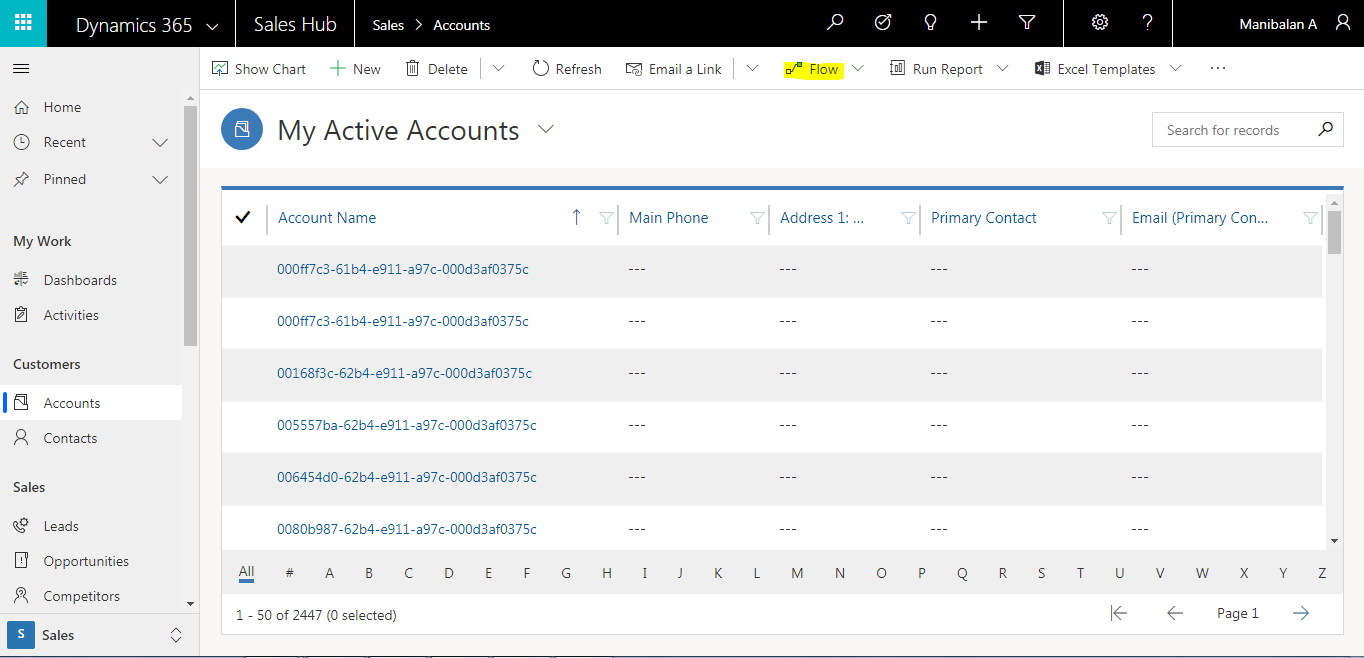
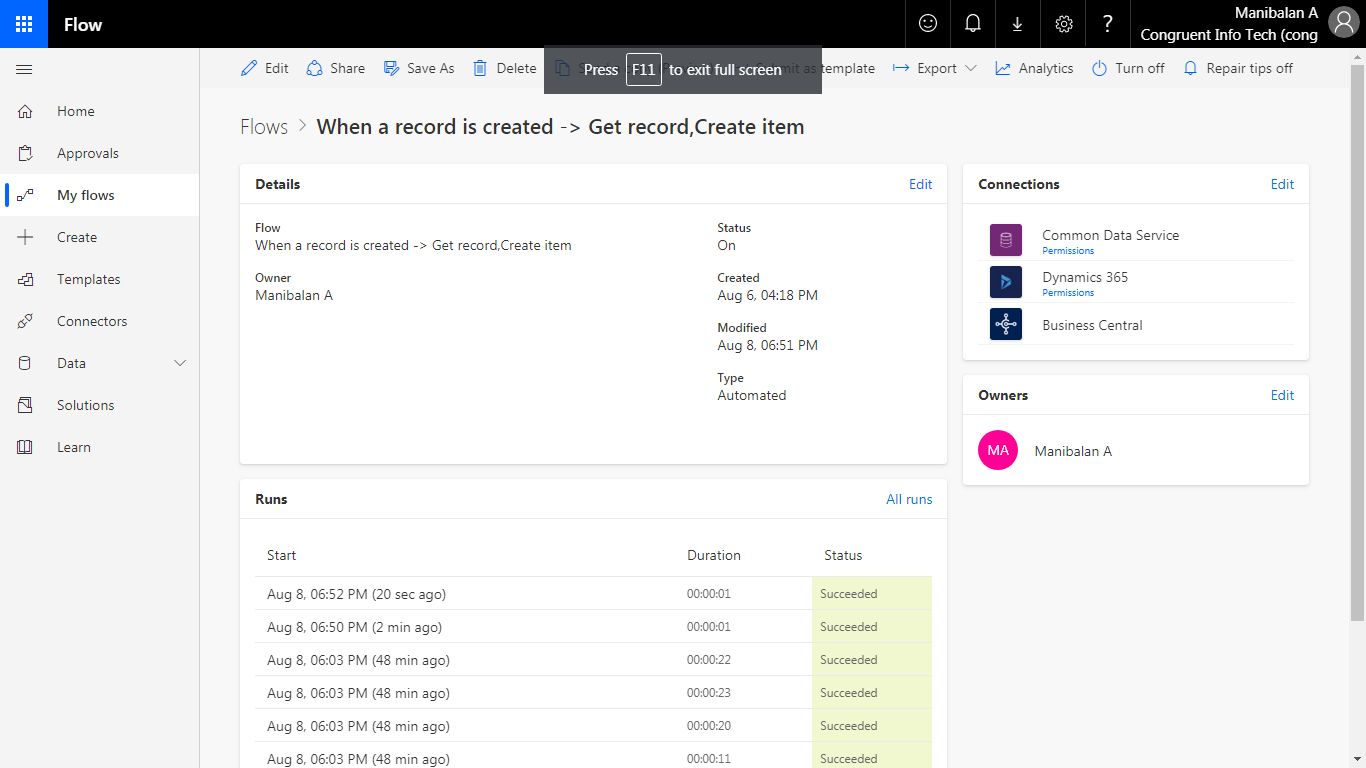
- To activate a flow in CRM, click ‘Flow’ from the account page
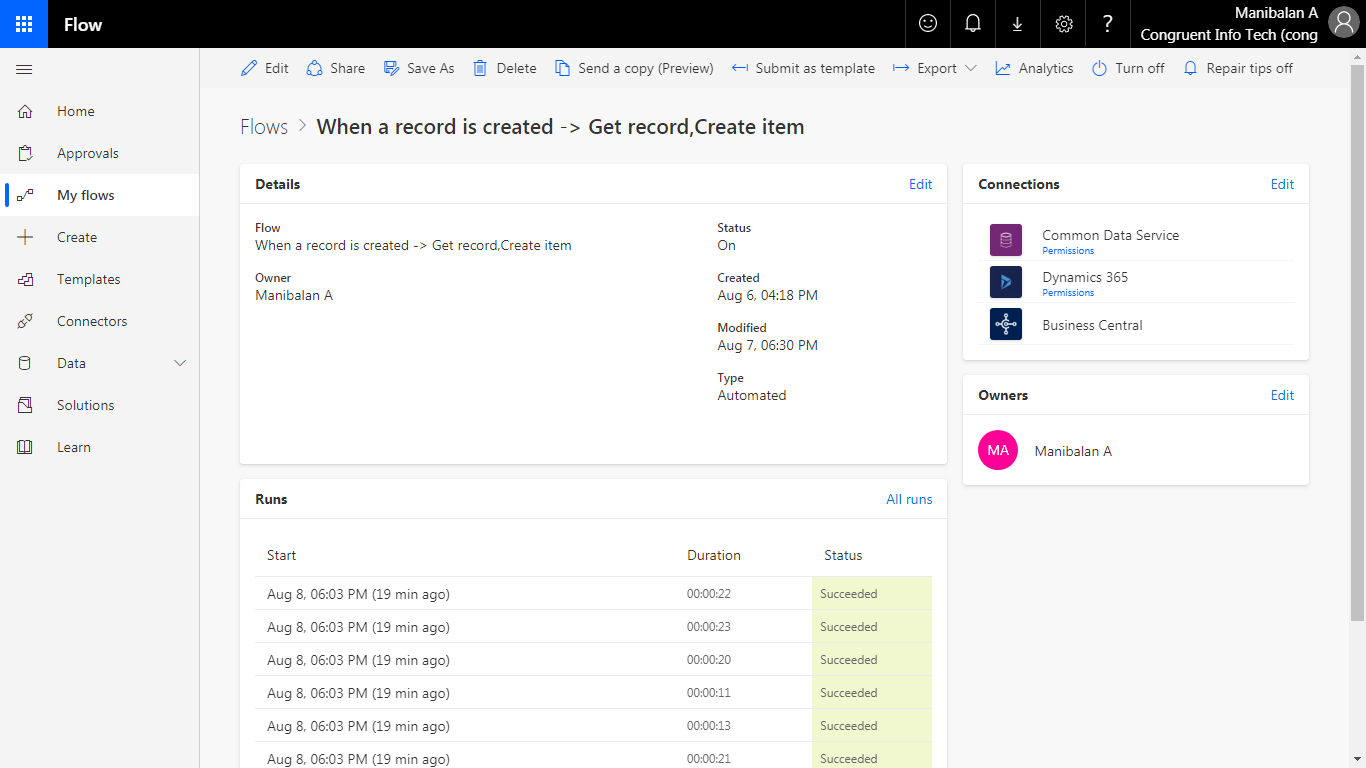
- Check the status of flow whether it is running, failed or successful
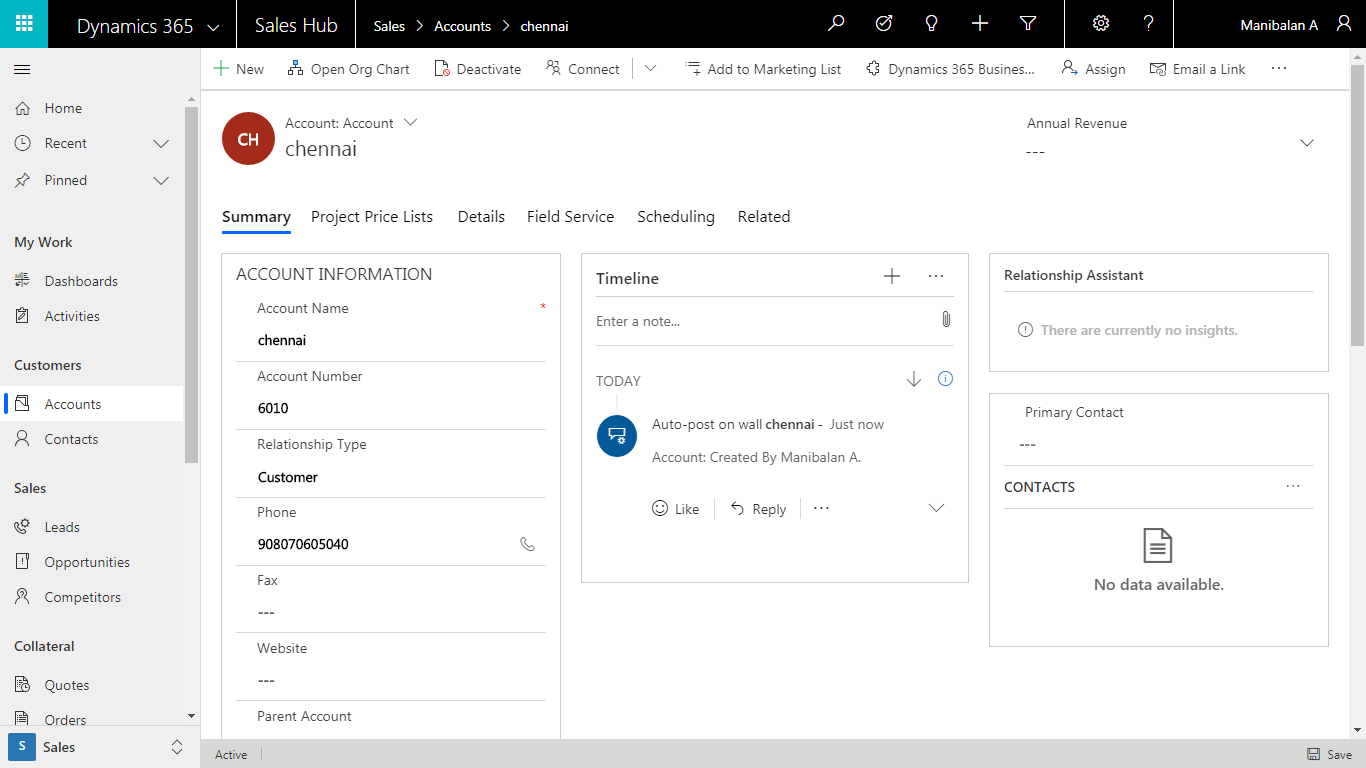
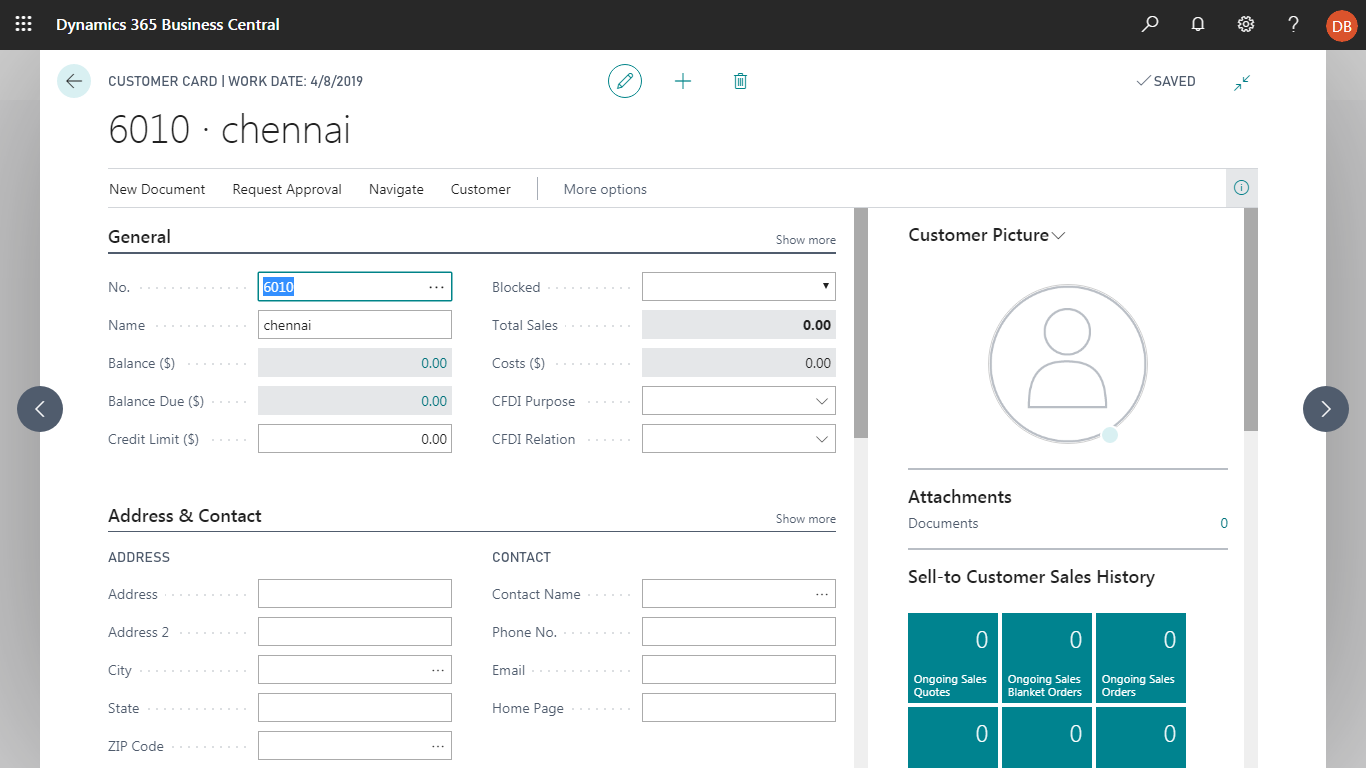
- Once the flow has succeeded, check the record in Dynamics 365 Business Central
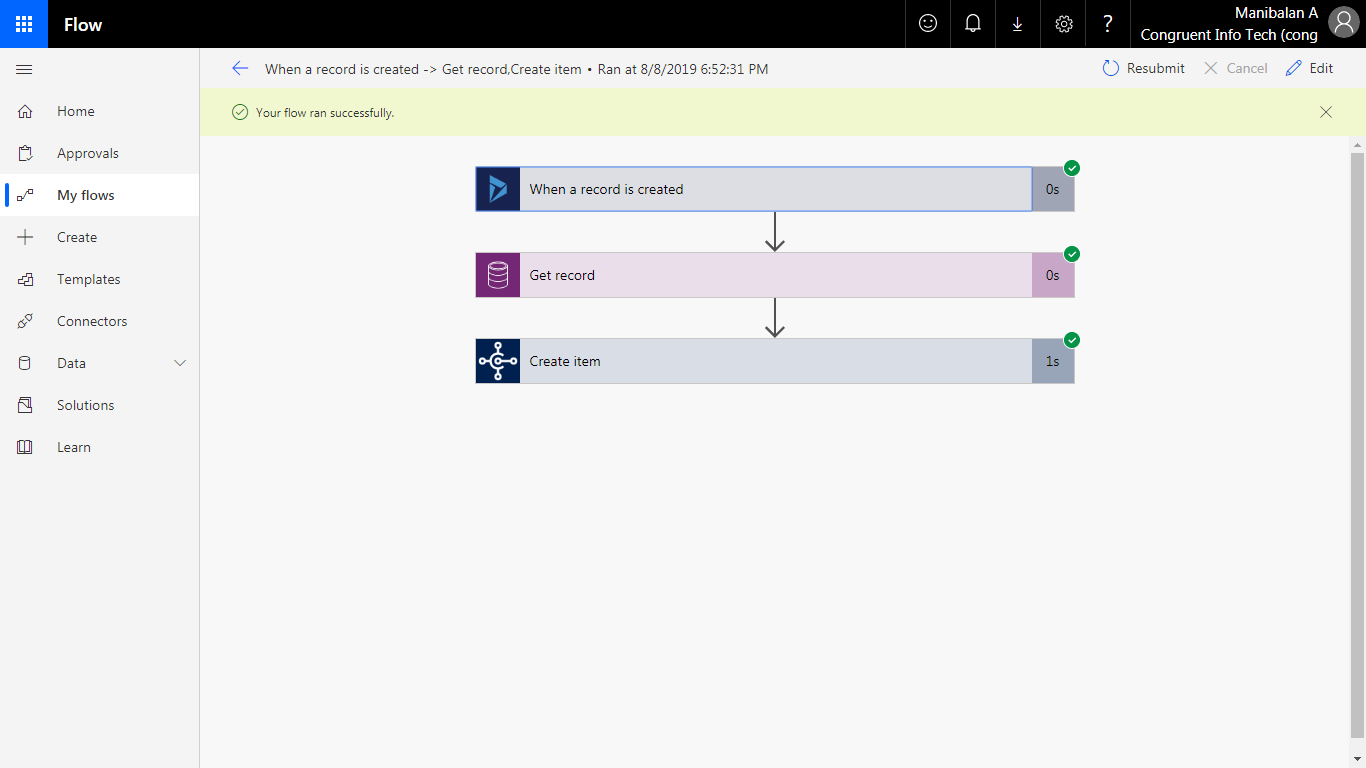
- A preview of the created flow
Steps to send email notification, condition and expression in integration
Follow the above steps mentioned in normal integration to create the customer in Business Central. As the final step includes email, a condition needs to be implemented.
-
- Create the trigger and action mentioned in the above steps in integrating CRM to Business Central
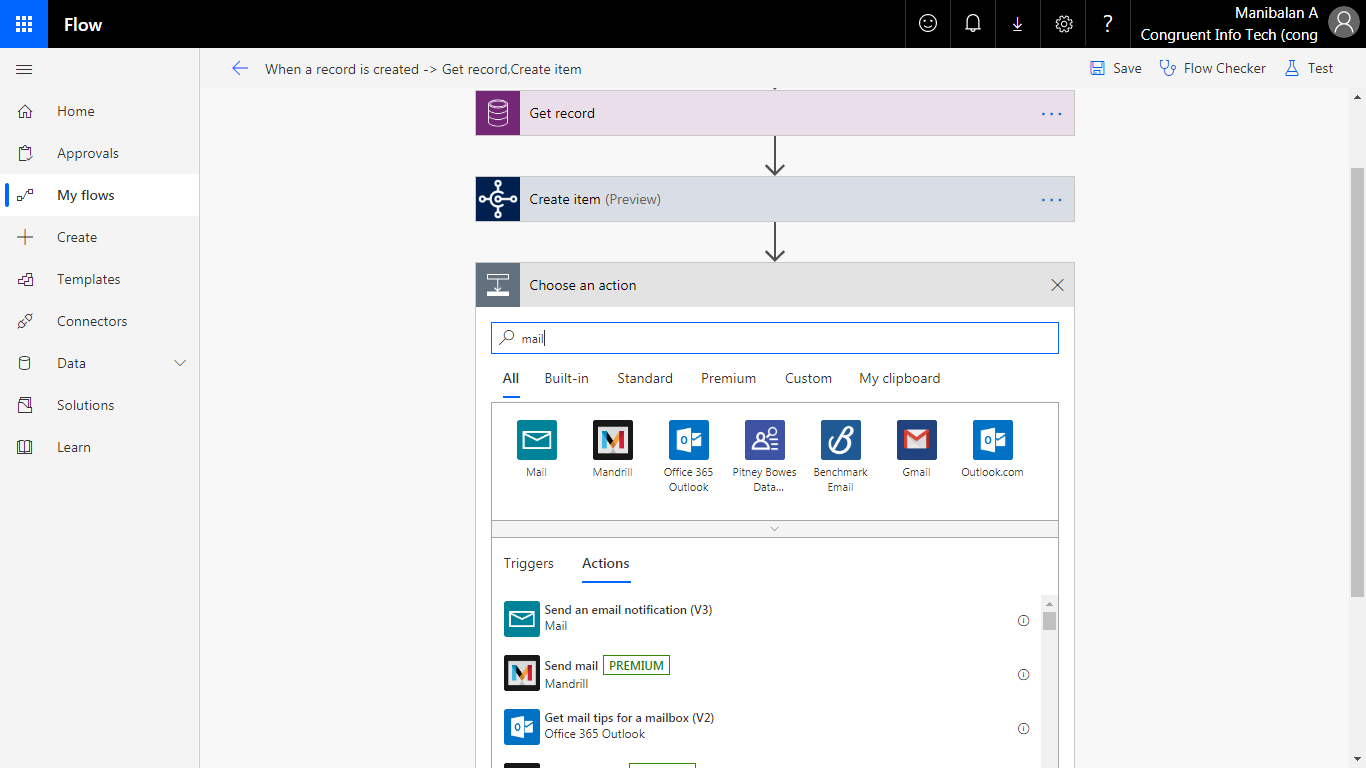
- As the final step includes the connector mail to receive the mail once the customer has been created. Choose the action to be performed by the connector mail.
crm
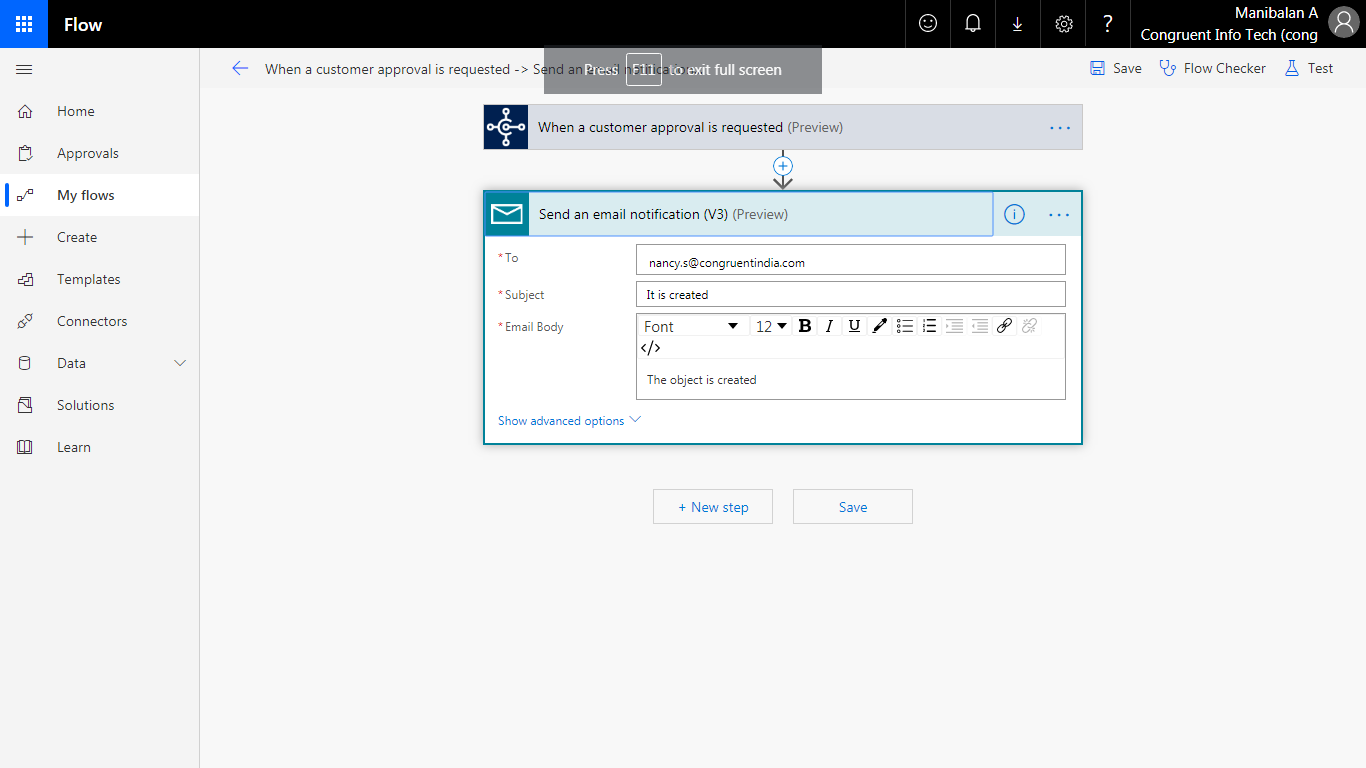
- Select ‘Send an email notification’ action to receive mail once the action has succeeded

- For using the condition in a flow, choose the control connector to perform the trigger action
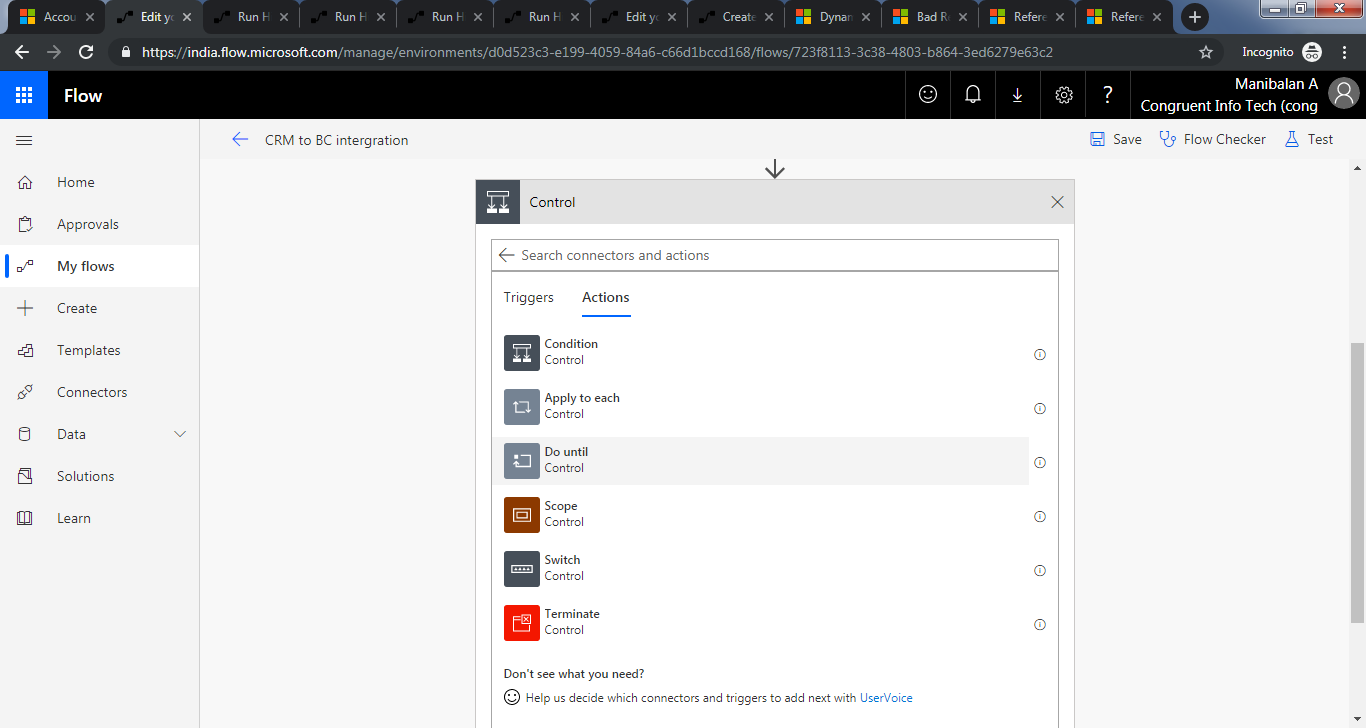
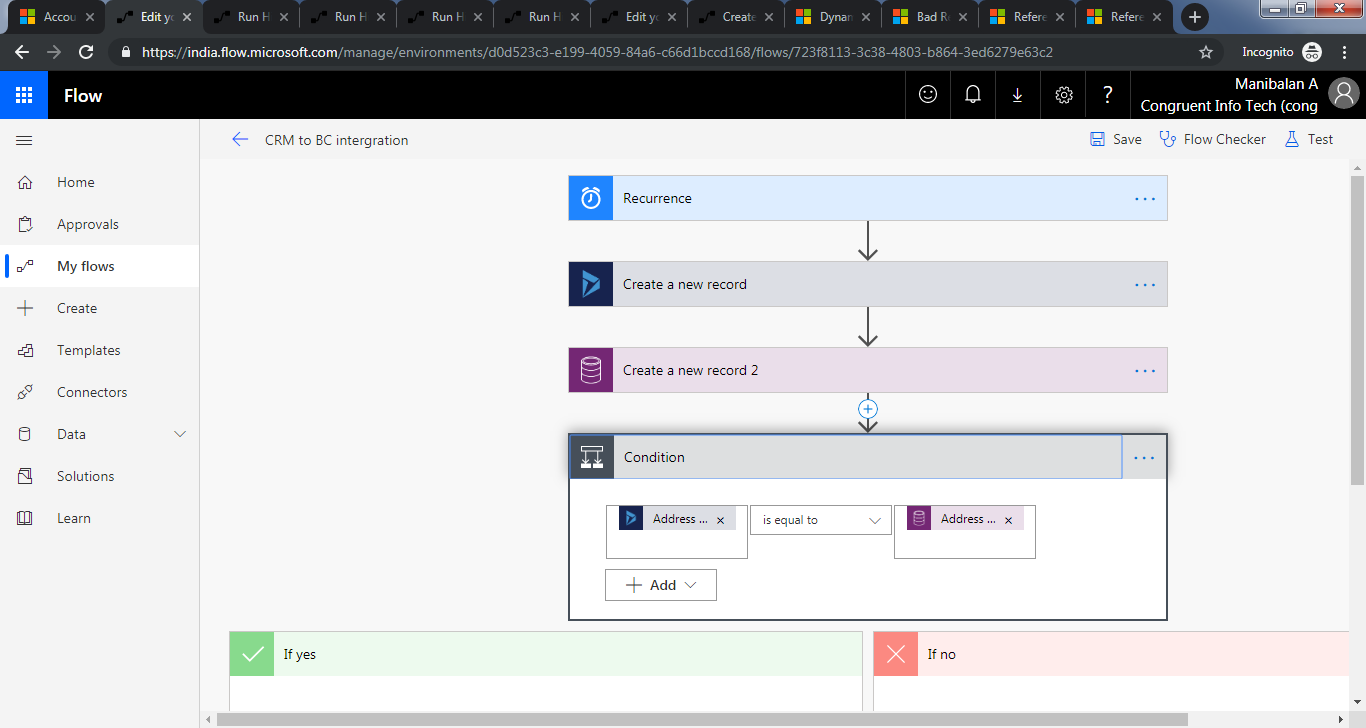
- Select the required condition to perform the action.The condition ‘is equal to’ is used in this sample in order to get the desired result
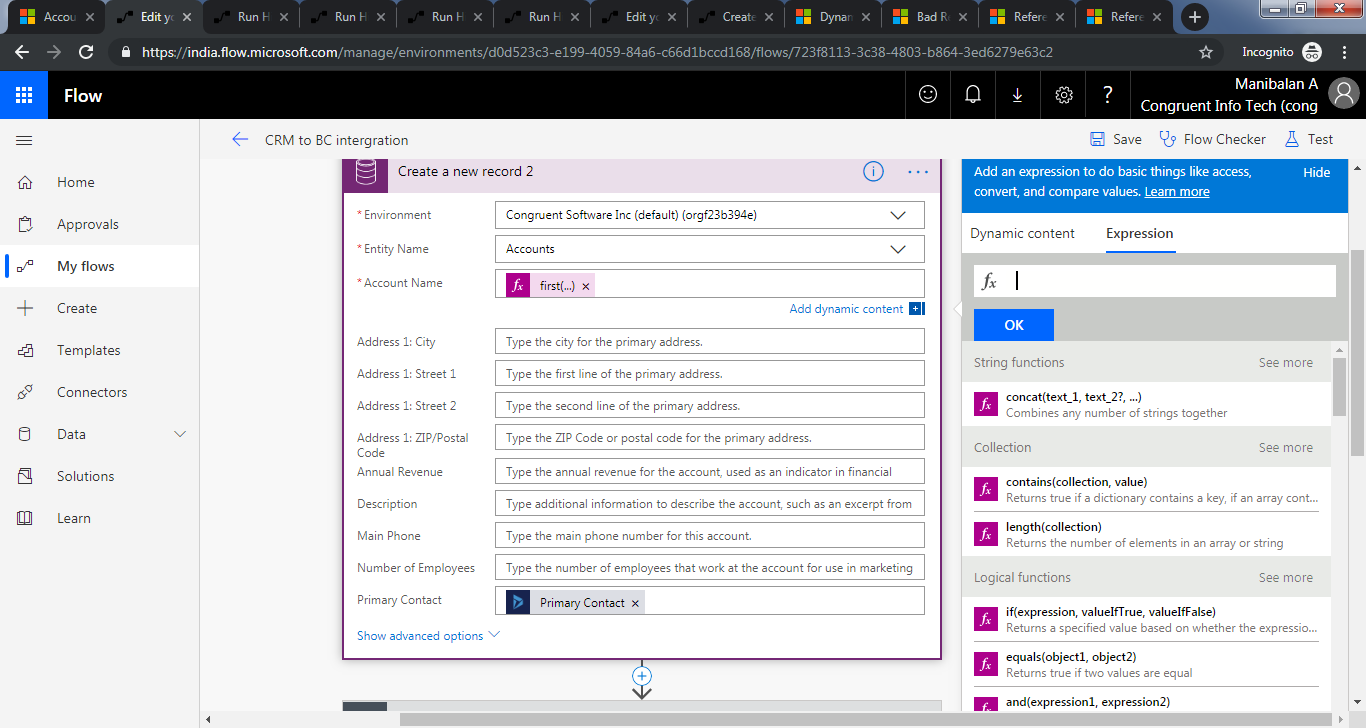
- Expression in flow is used to retrieve data from the application. There are predefined expressions available in flow as templates
By partnering with a trusted Business Central partner, you can integrate these platforms to enhance your customer management processes, streamline business operations, and gain a competitive advantage.