A SharePoint connector simplifies data sharing, by connecting Dynamics 365 Business Central and SharePoint Document Library. By integrating data, information can be managed within Dynamics system as well as from Microsoft SharePoint. This integration process allows users to perform activities such as,
- Uploading / downloading a document
- Generating document
- Converting word document as a pdf file
- Browsing on SharePoint
- E-signing
- File sharing
- Folder mapping
Connecting SharePoint and Business Central enhances document handling and teamwork. Though beneficial, the setup can be intricate. Discover how to boost efficiency and collaboration within your organization through our expert insights.
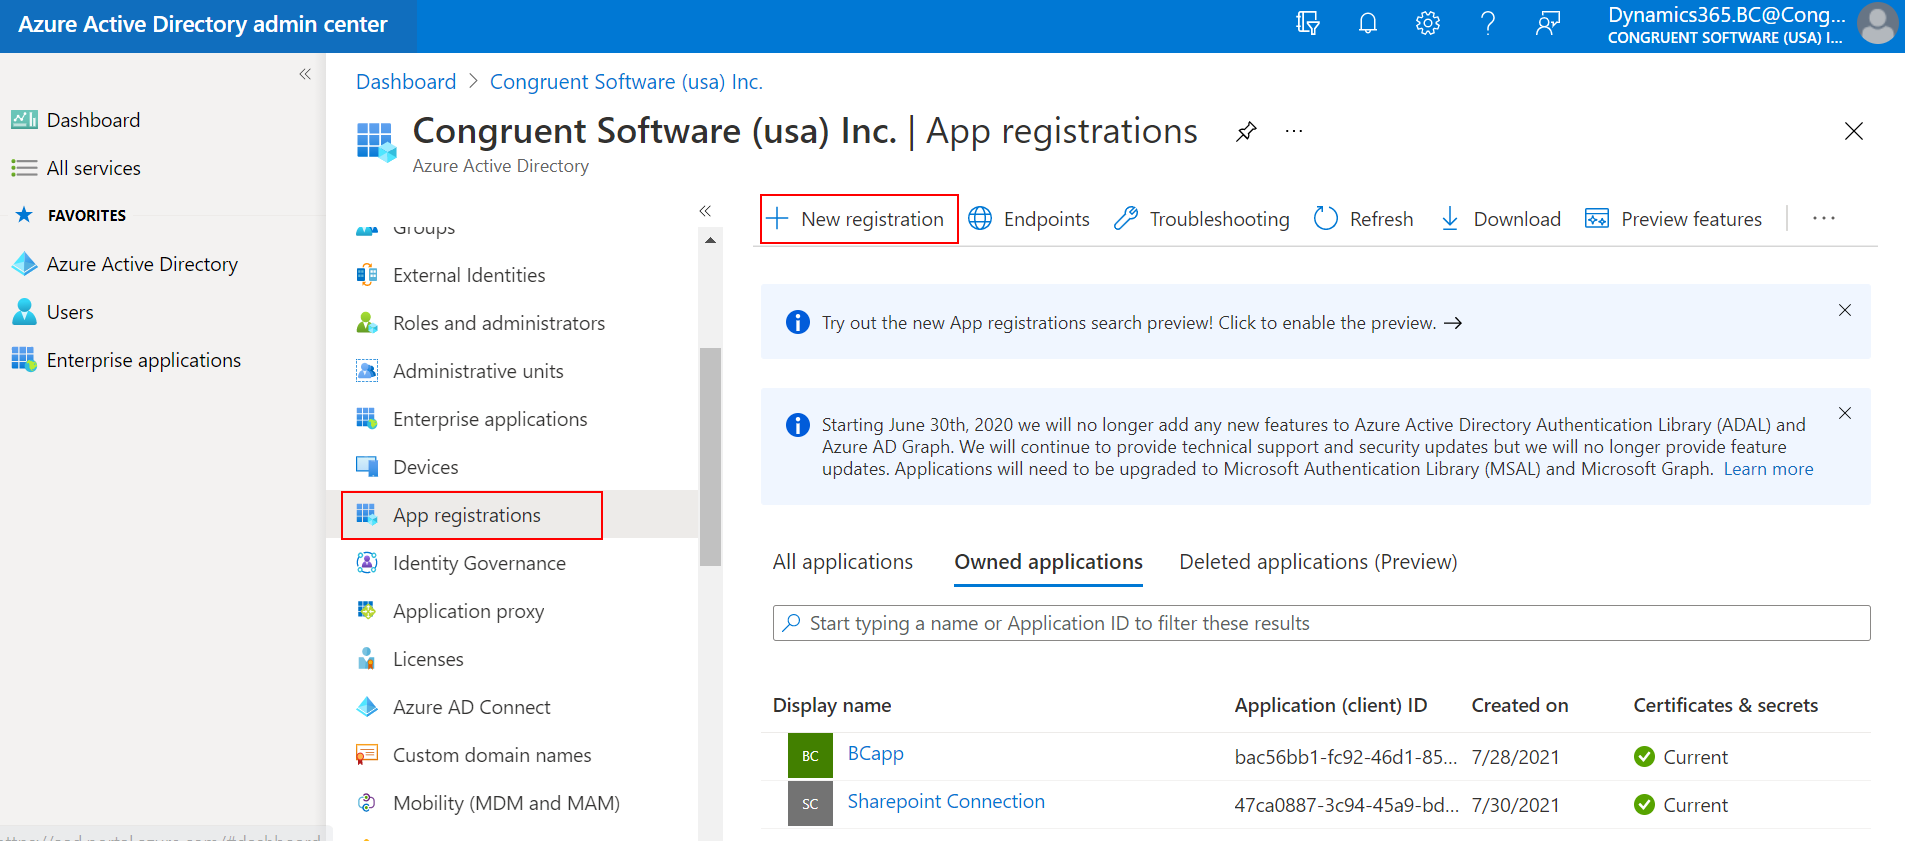
STEP 1: Login to the Azure active directory using Dynamics 365 Business central credentials. From the left side pane, choose app registration and click new registration
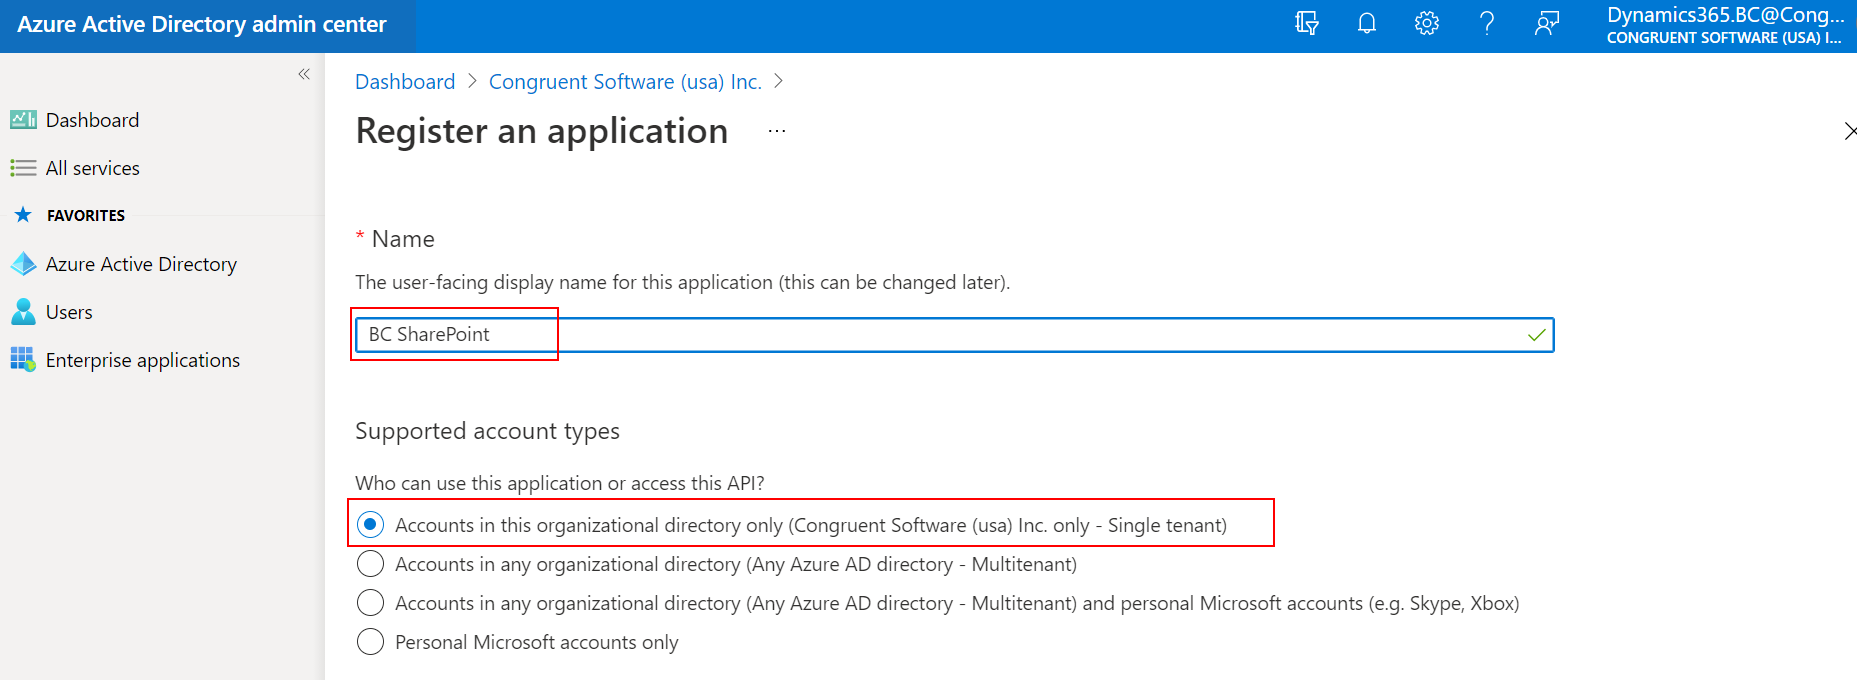
STEP 2: Provide the connection name and select the application access as “accounts in the organization directory only”
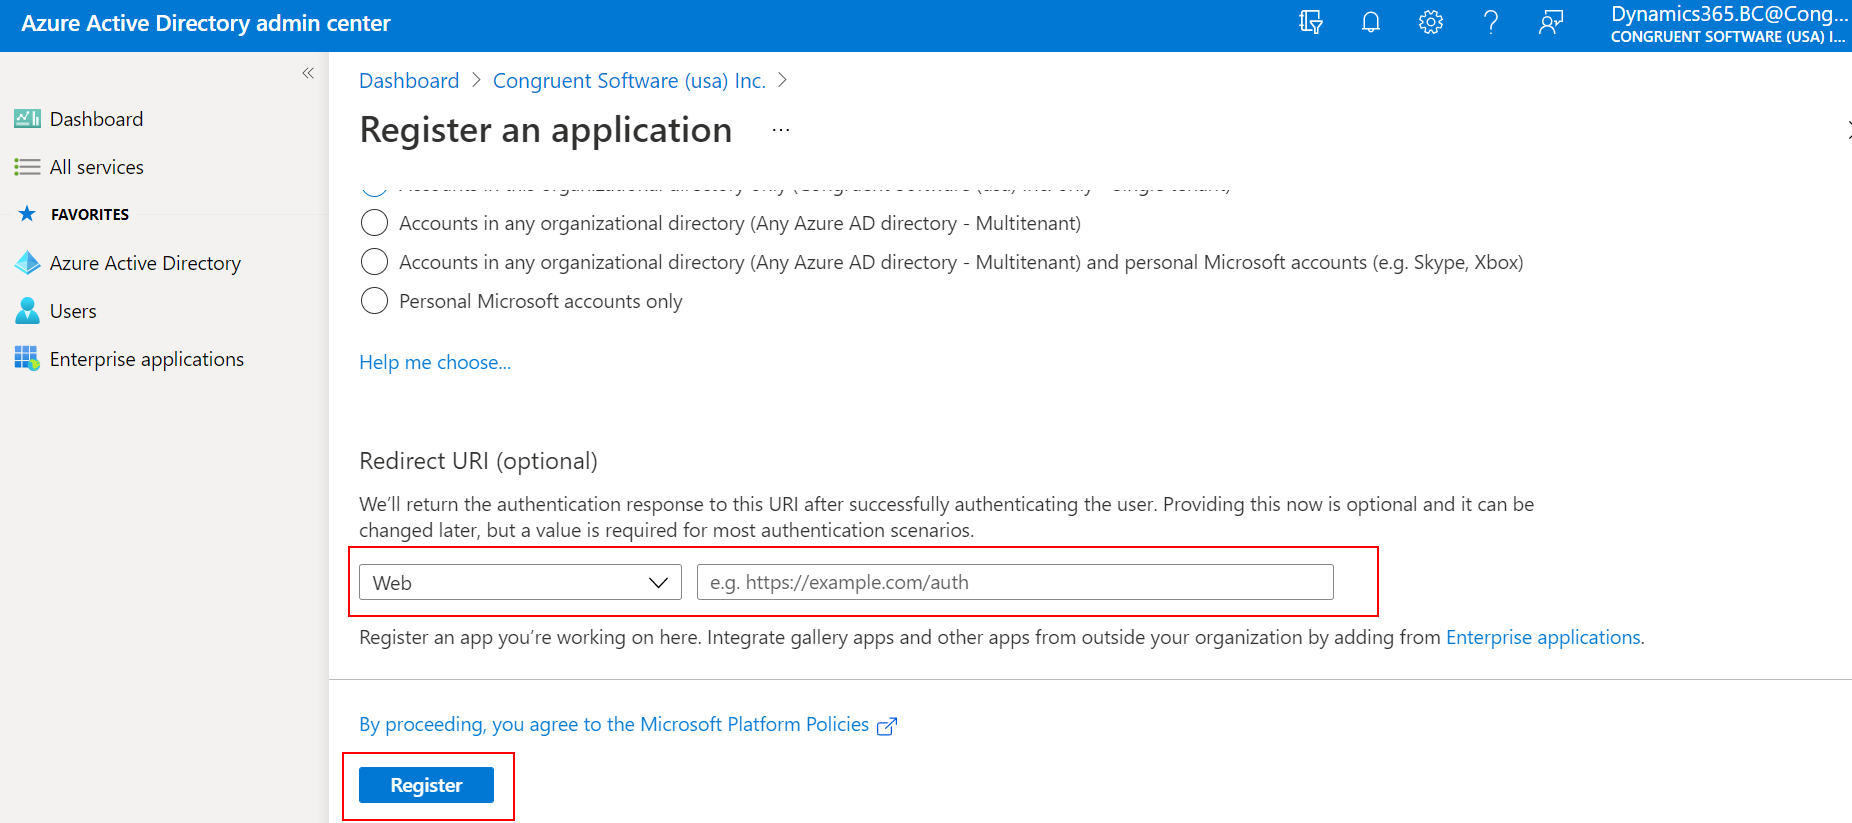
STEP 3: Choose the redirect URL as web and provide the url as “https://businesscentral. dynamics.com/ Production? page=70319501”
Note: If the sandbox environment need to be connected to the SharePoint provide “https://businesscentral. dynamics.com/Production ?page=70319501”
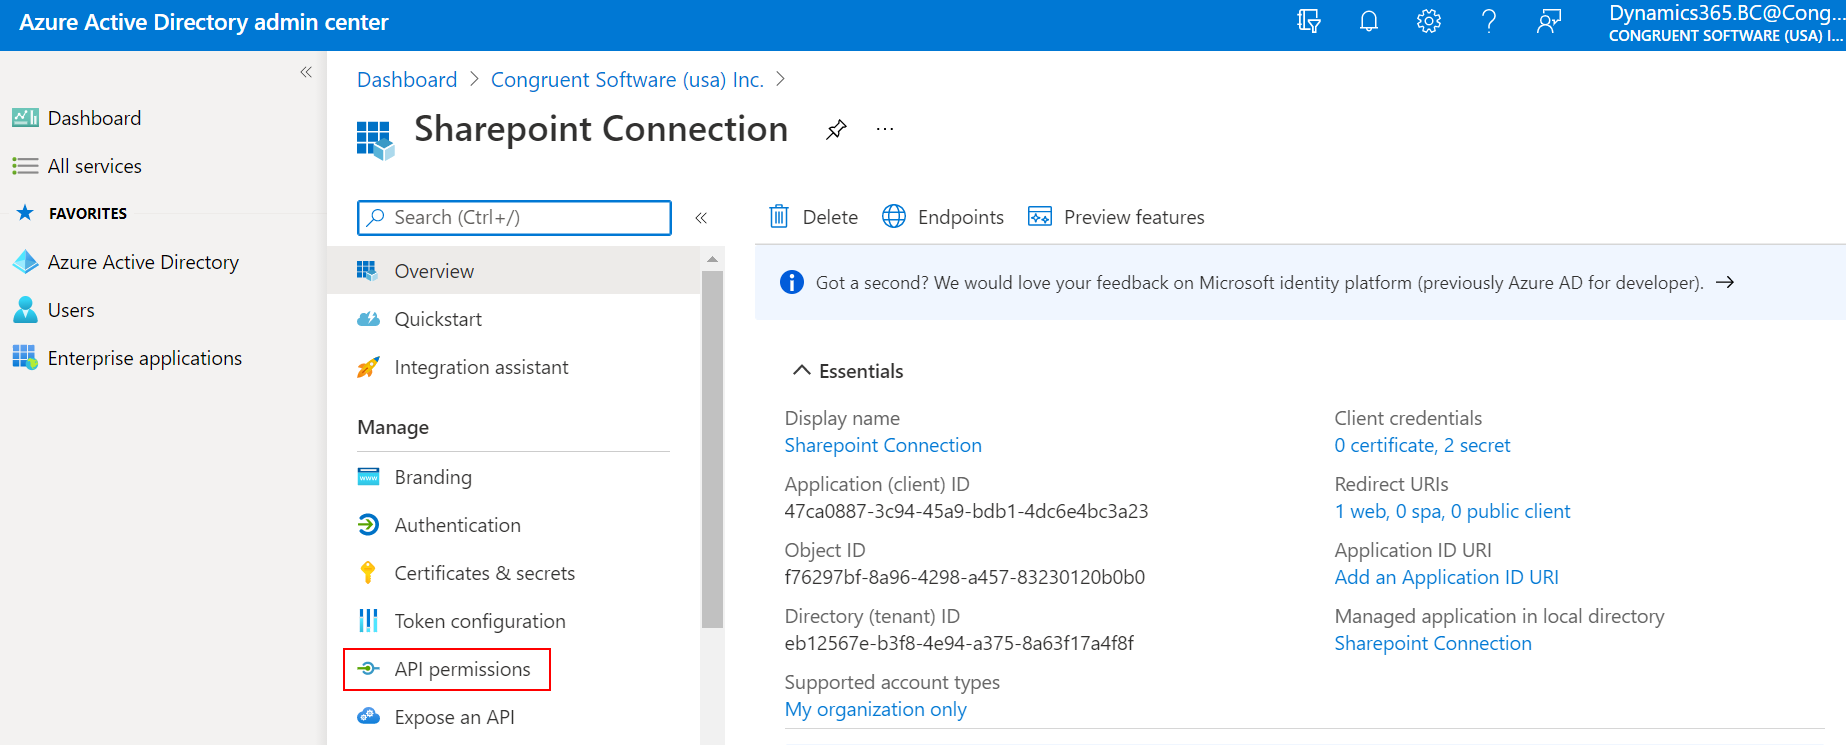
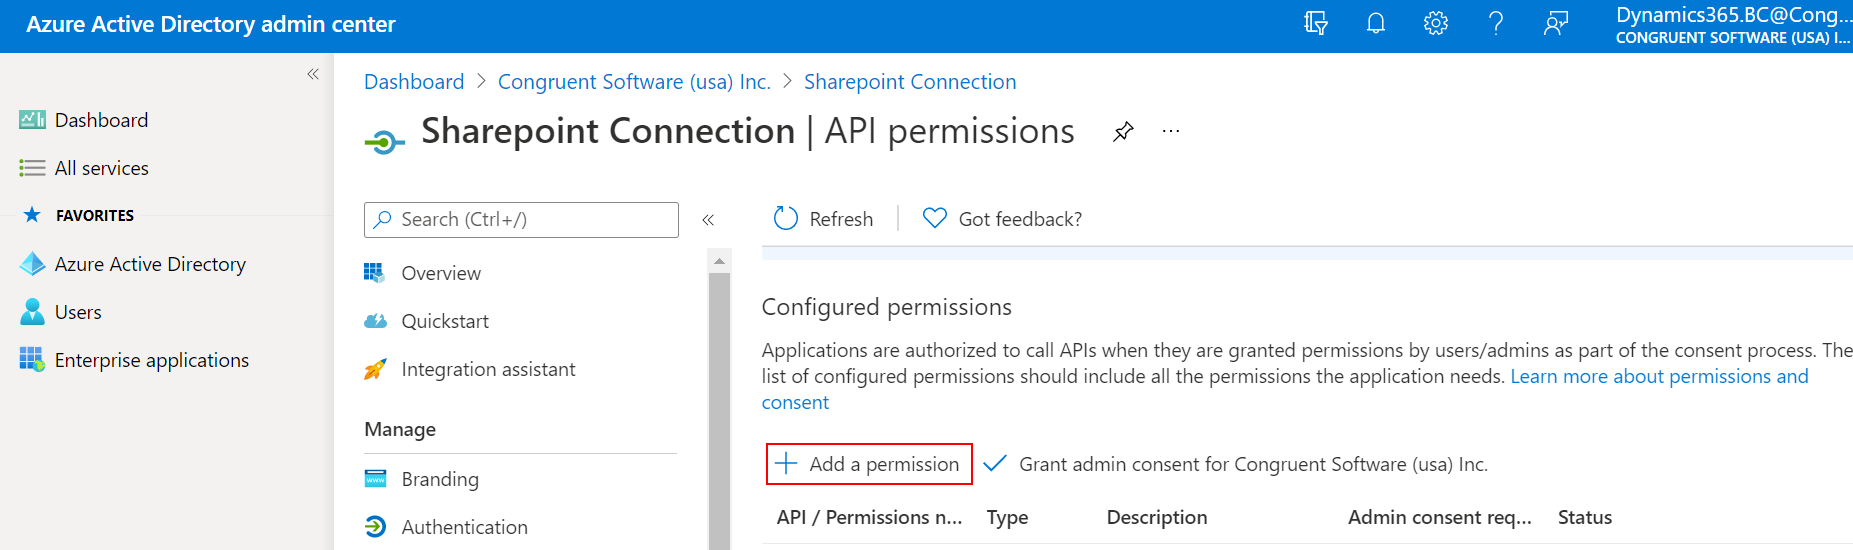
STEP 4: Now choose API permissions to grant access to the application. On redirecting to the page choose add a permission
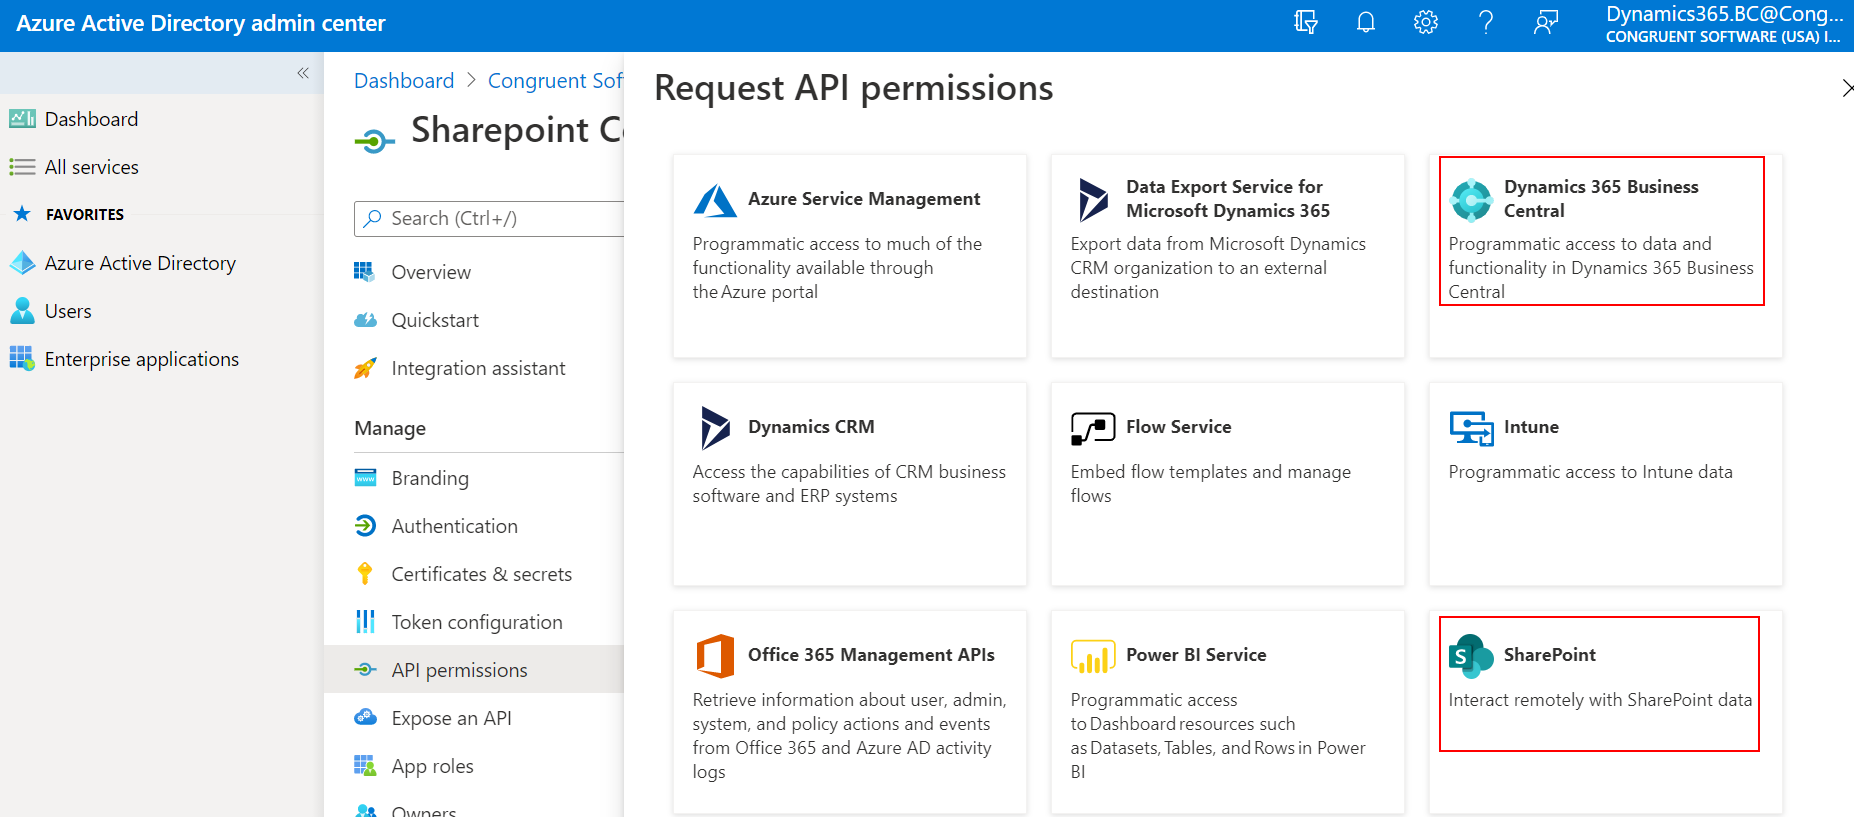
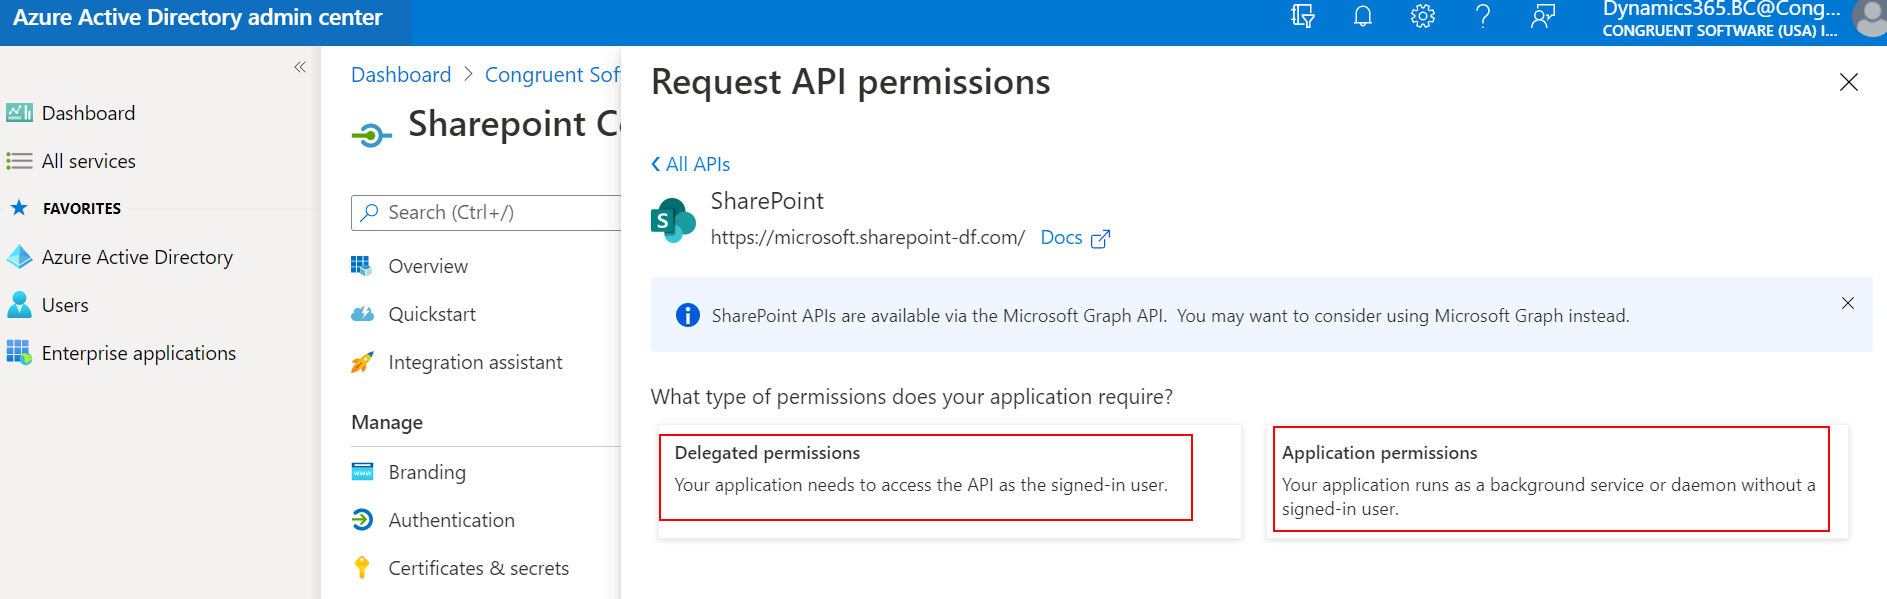
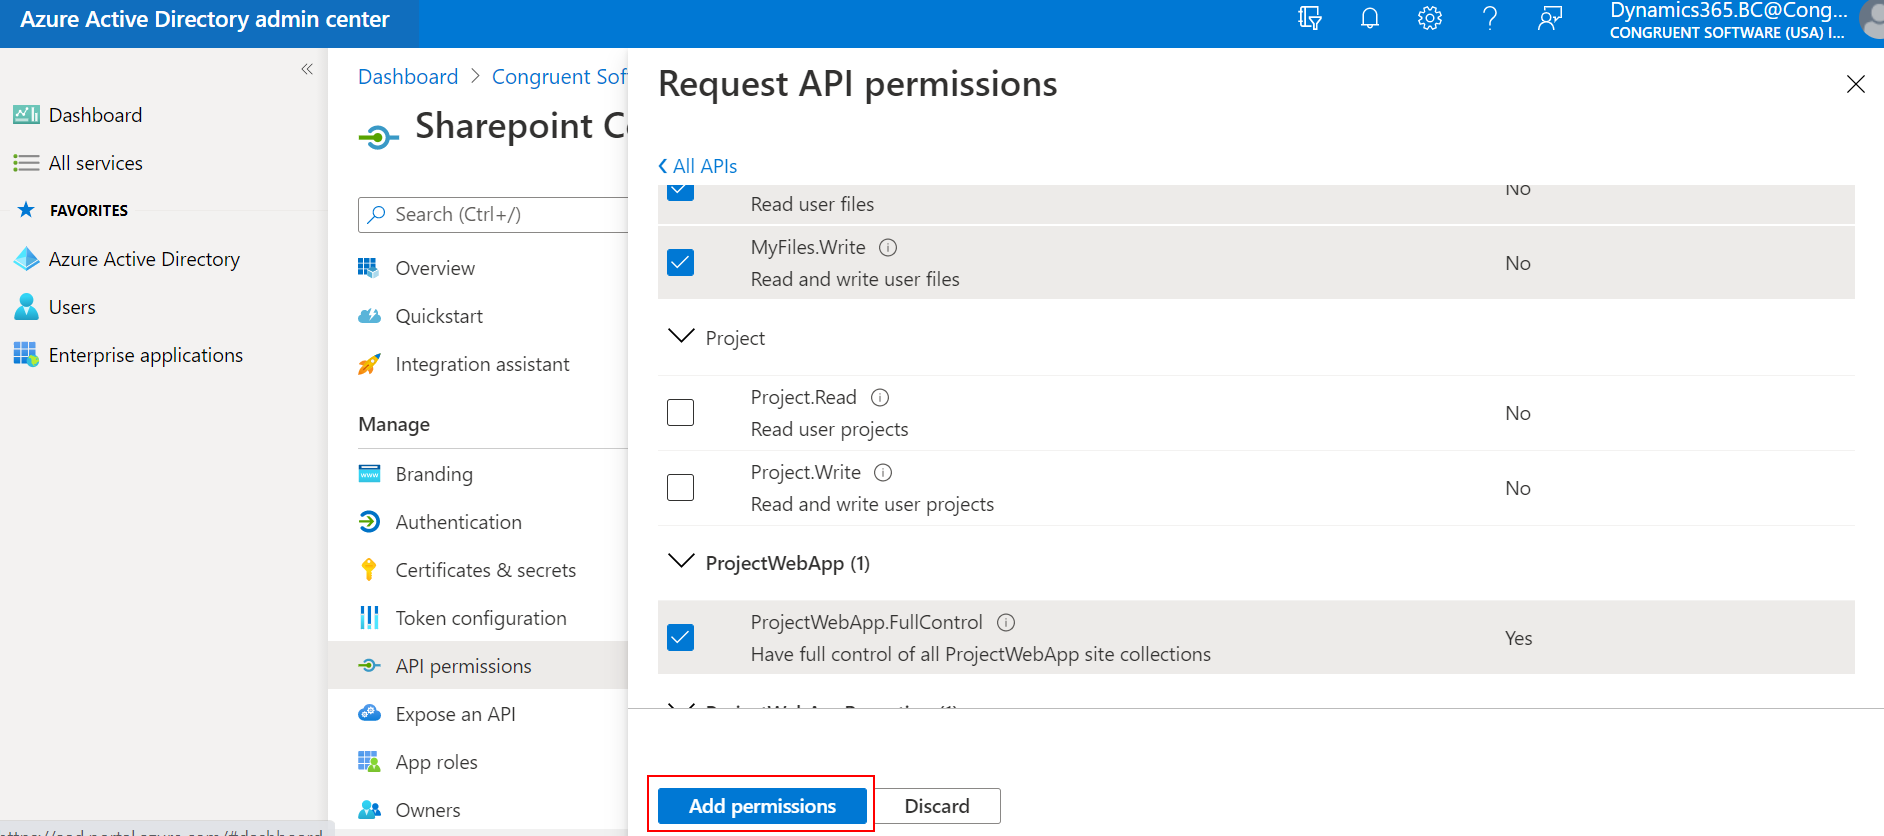
STEP 5: Now, choose SharePoint tile to grant permission. Select the delegate and application permission to provide read/write/manage permissions. Click on add permission to save
Note: Provide the delegate and application permissions for Dynamics 365 Business central
STEP 6: On adding permission, select “grant admin consent”

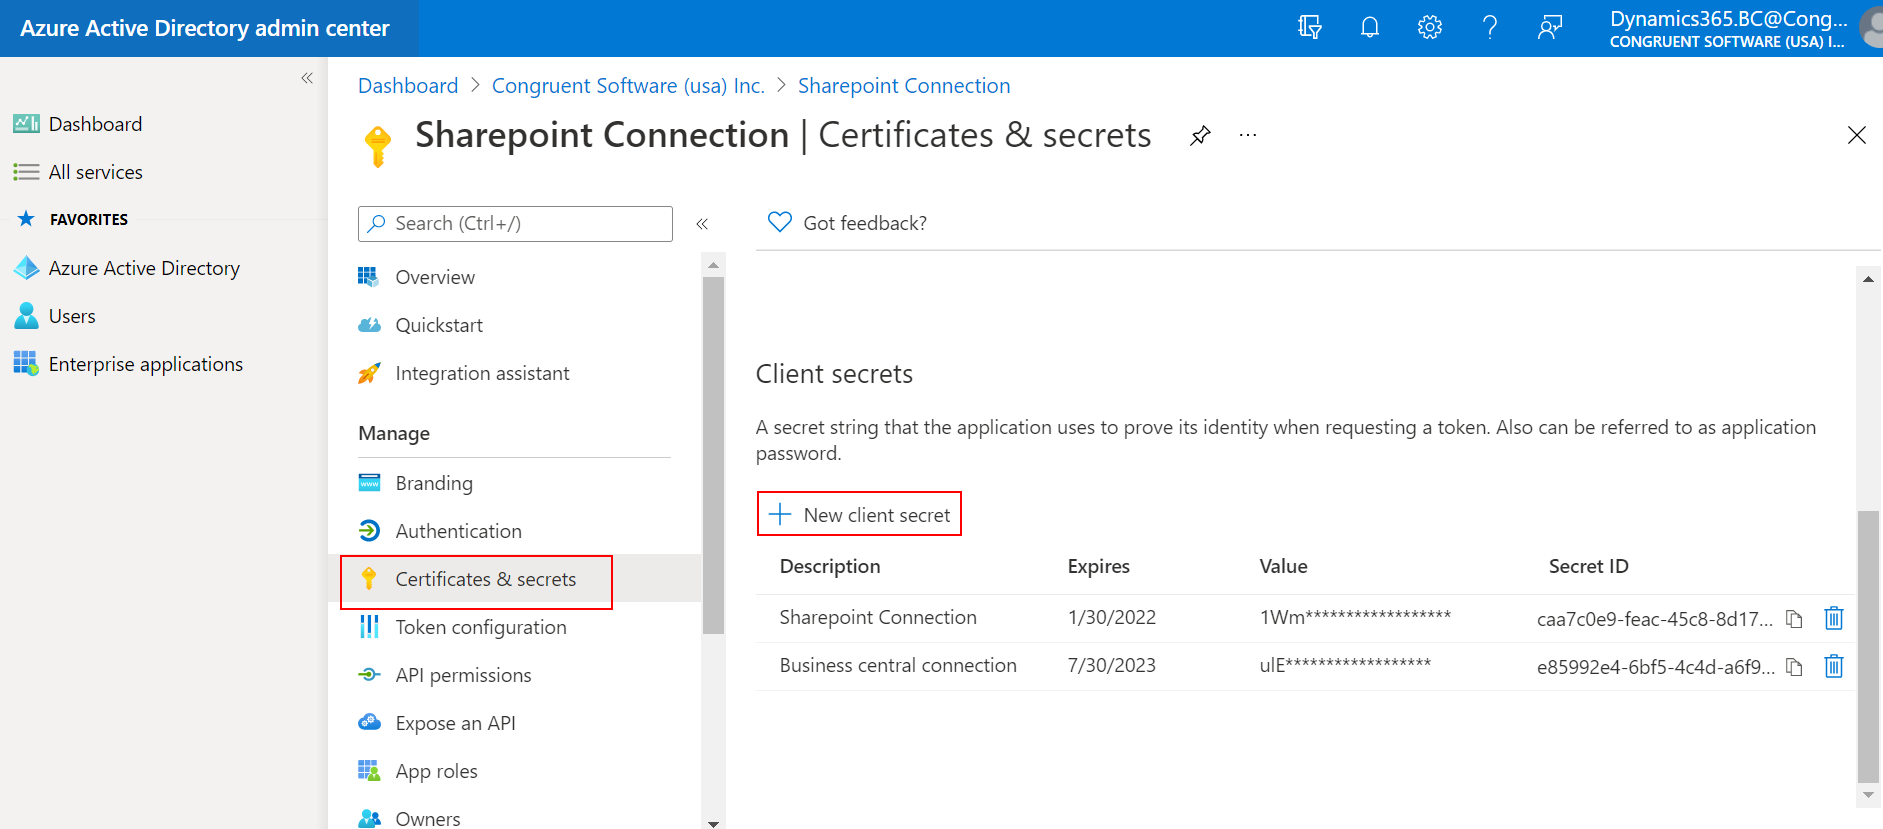
STEP 7: Now, add client secret for the application. Choose certificate and secrets tab and click new client secret
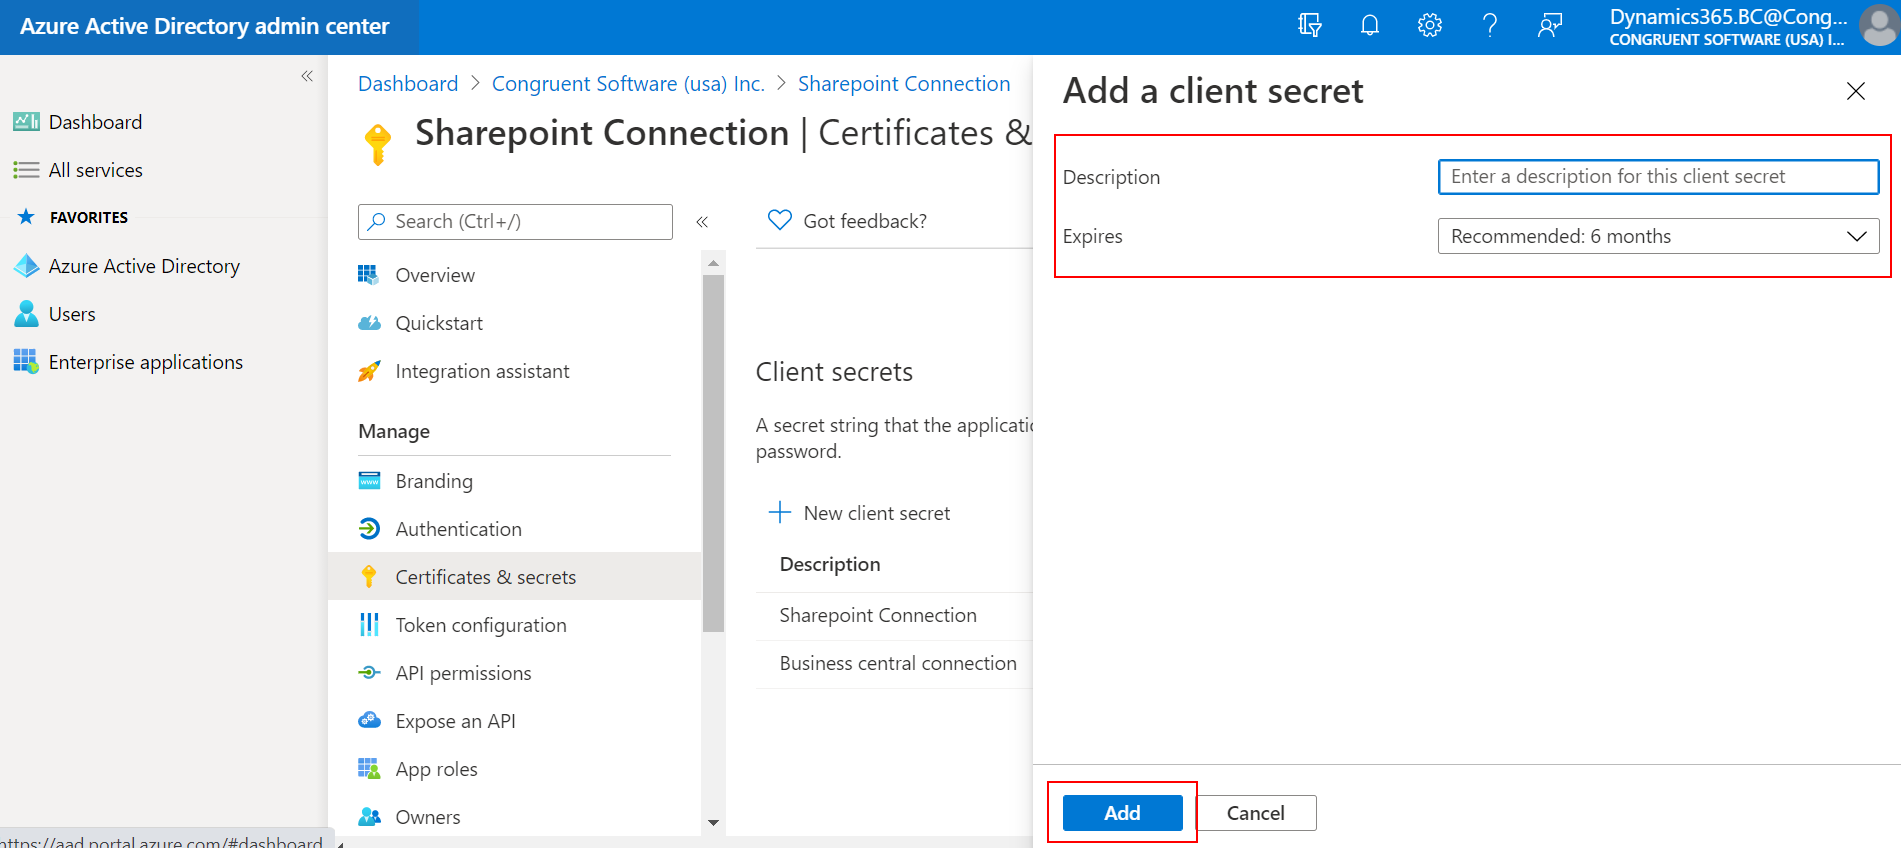
STEP 8: Add client secret name and choose the expiry date for the code. Click add
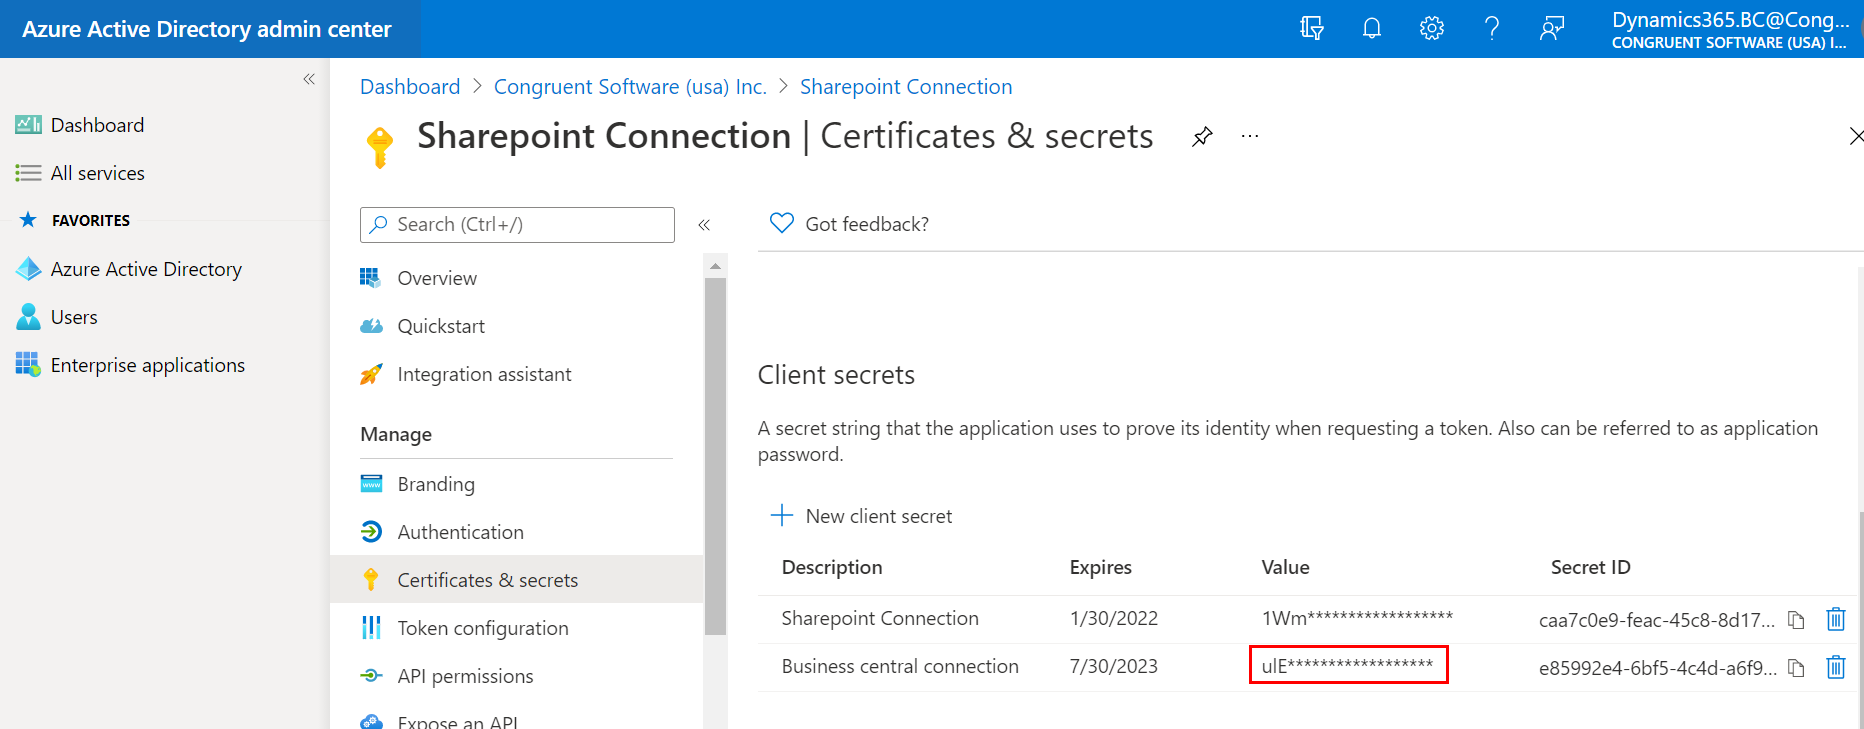
STEP 9: Copy the value of the secret code. Also copy client id of the application
Note: The value of the secret code should be copied within a minute on creating.

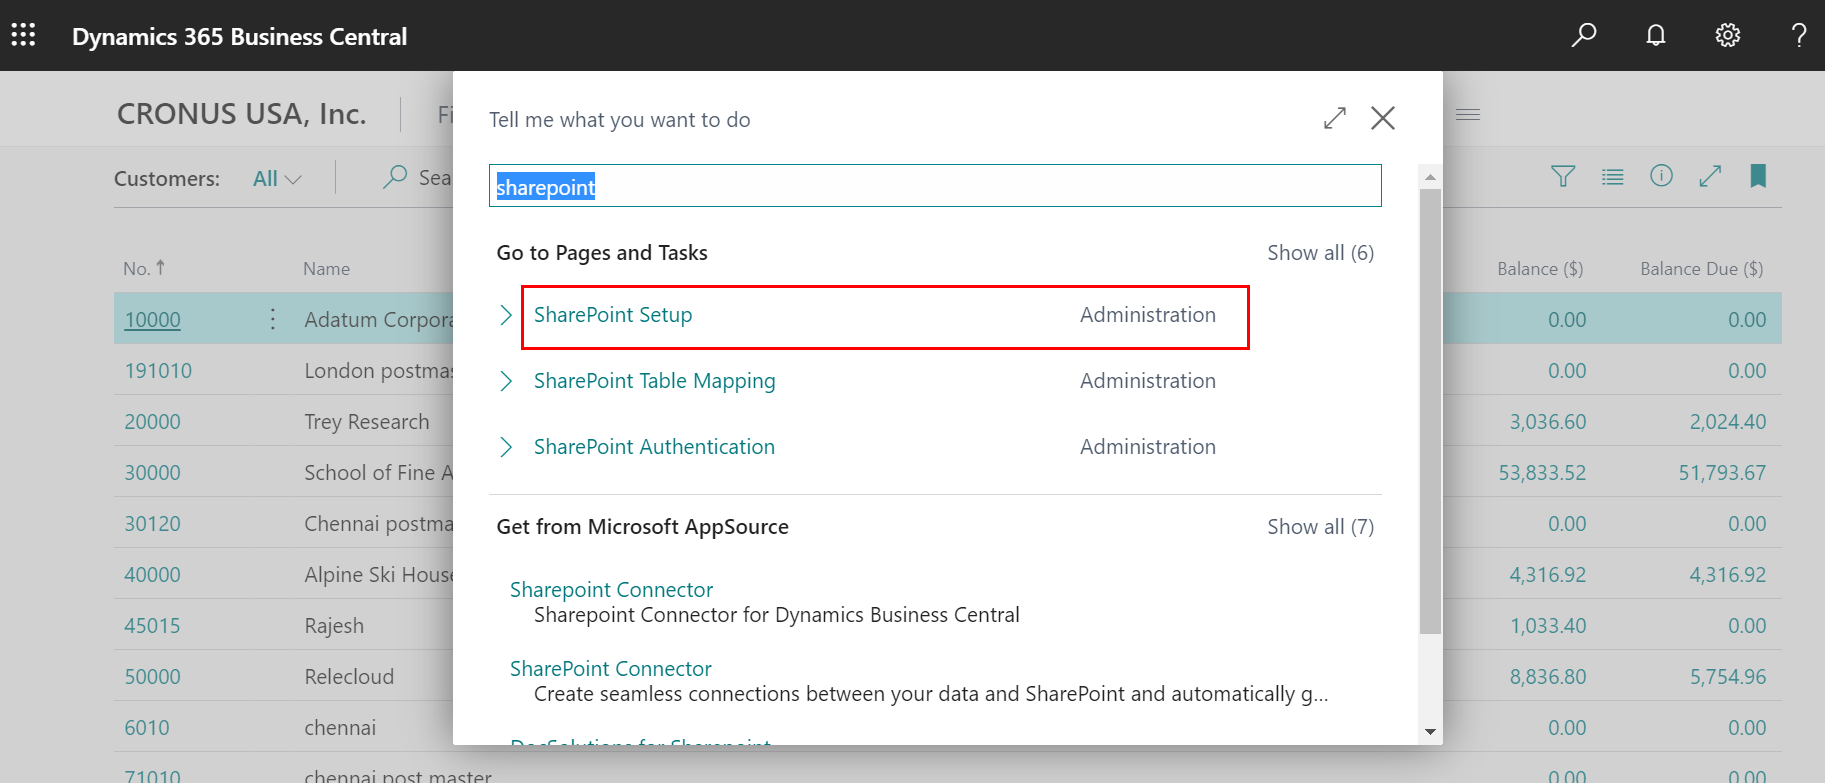
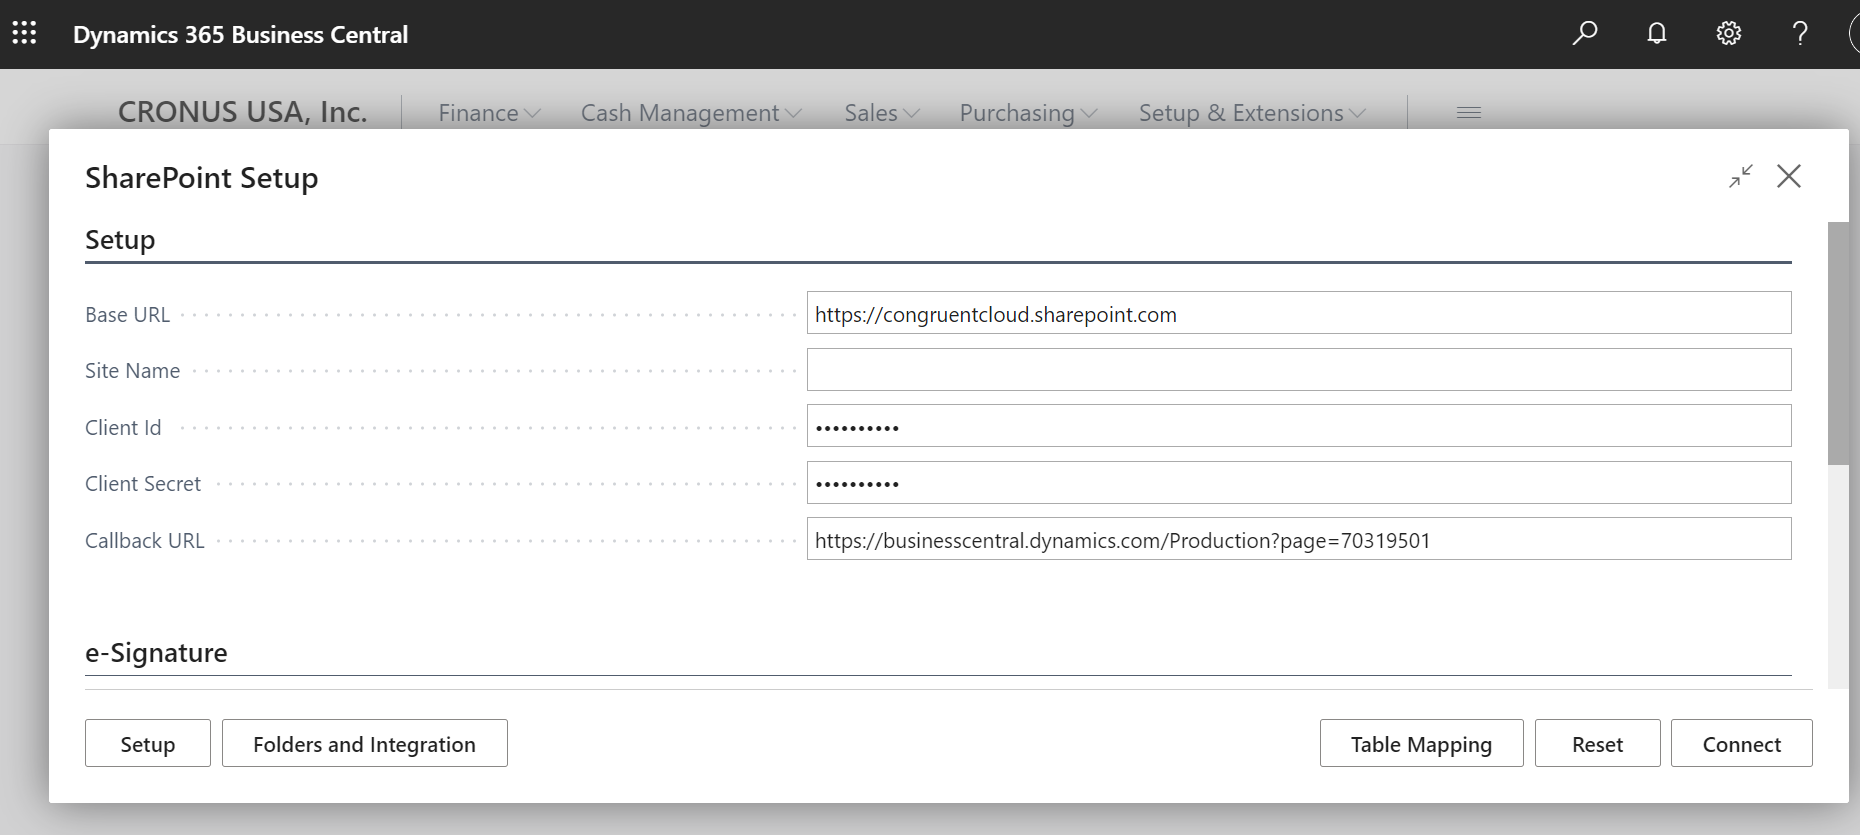
STEP 10: Login to the Dynamics 365 Business central environment and search for SharePoint setup
STEP 11: Provide the following details,
Base URL: Provide the SharePoint URL for connection
Client id: Provide the client id of the application
Client secret: Provide the secret code of the application
Callback URI: Provide the redirect URI provided in application
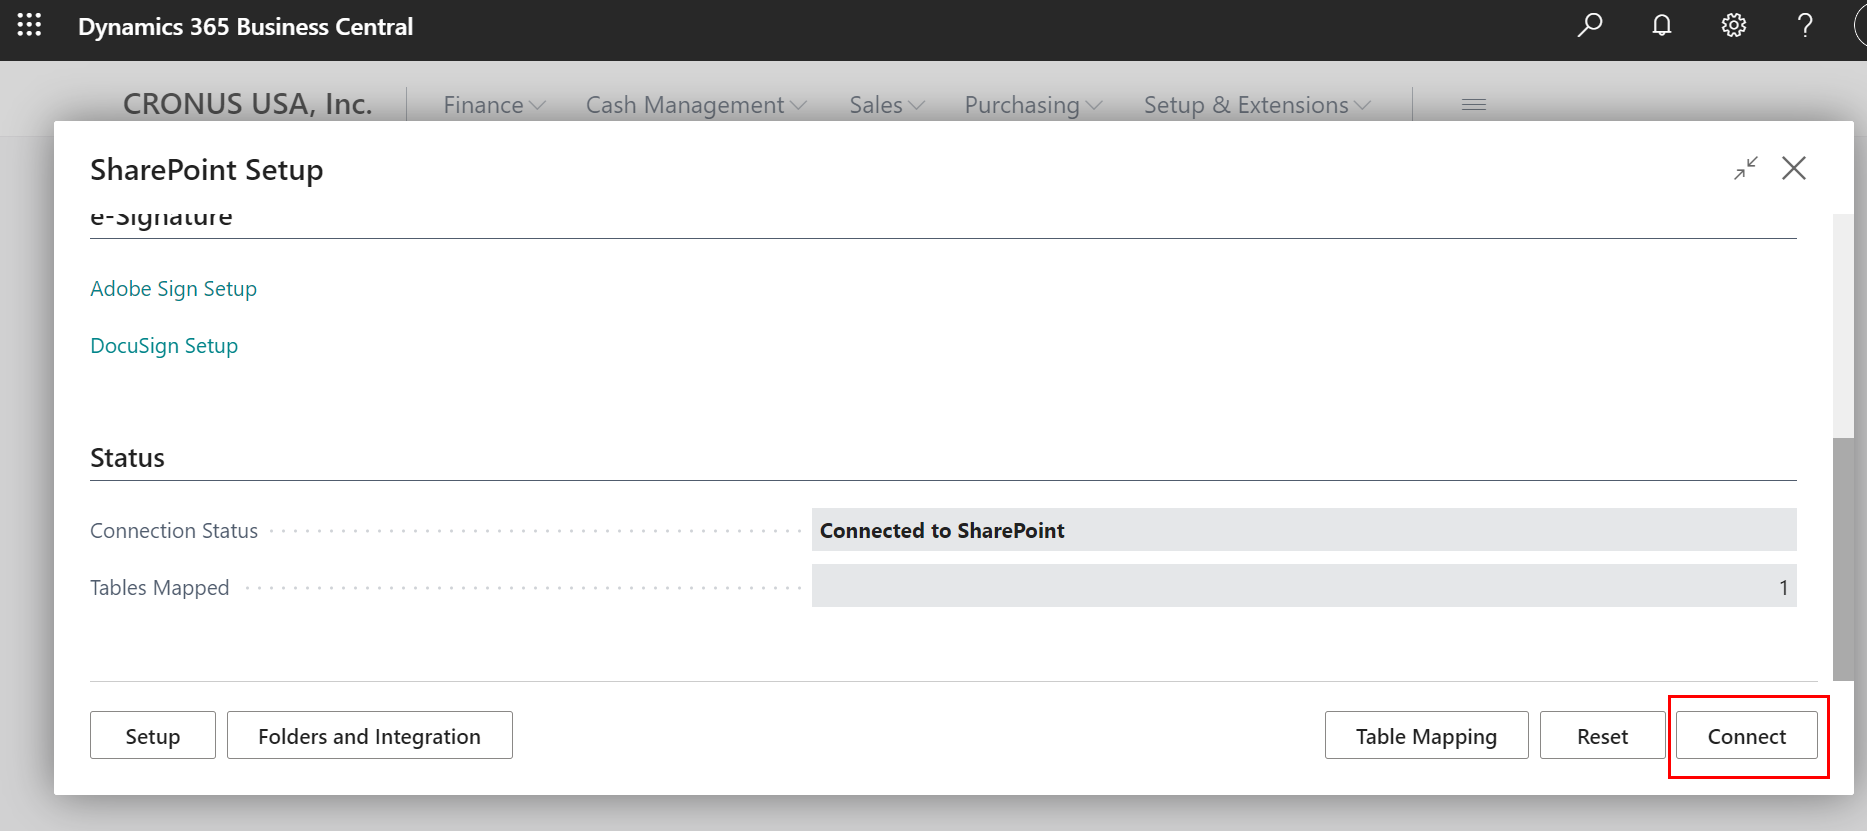
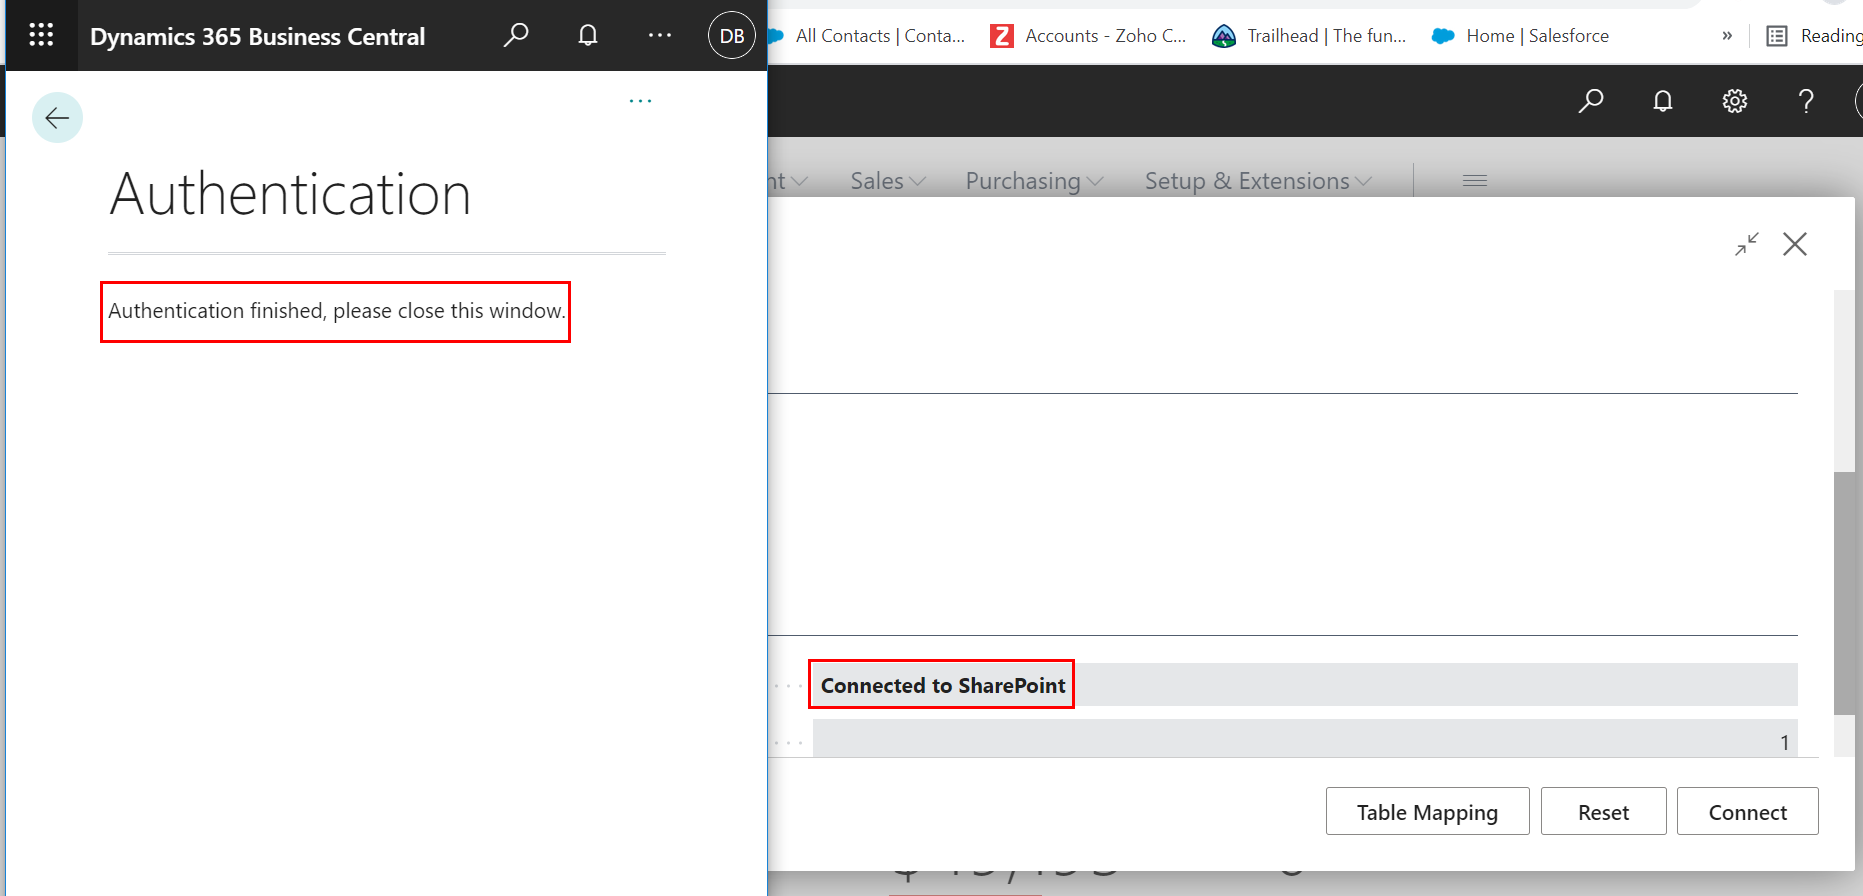
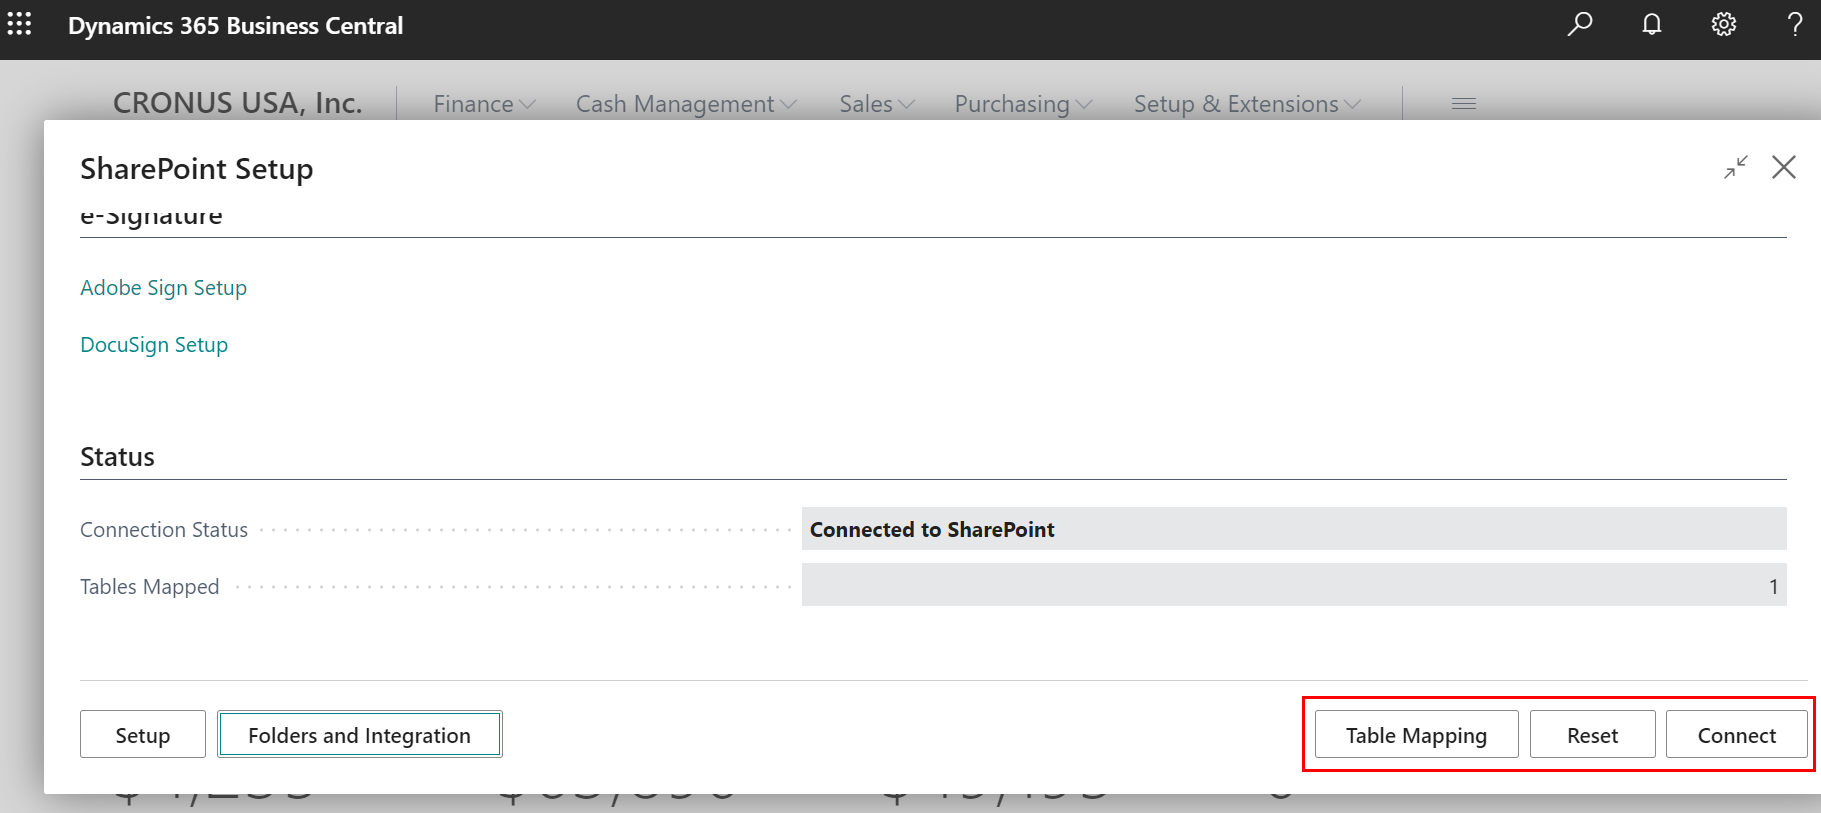
STEP 12: On providing the details, click on connect. On clicking, the authentication pop window is redirected. Now SharePoint is connected to Dynamics 365 Business central
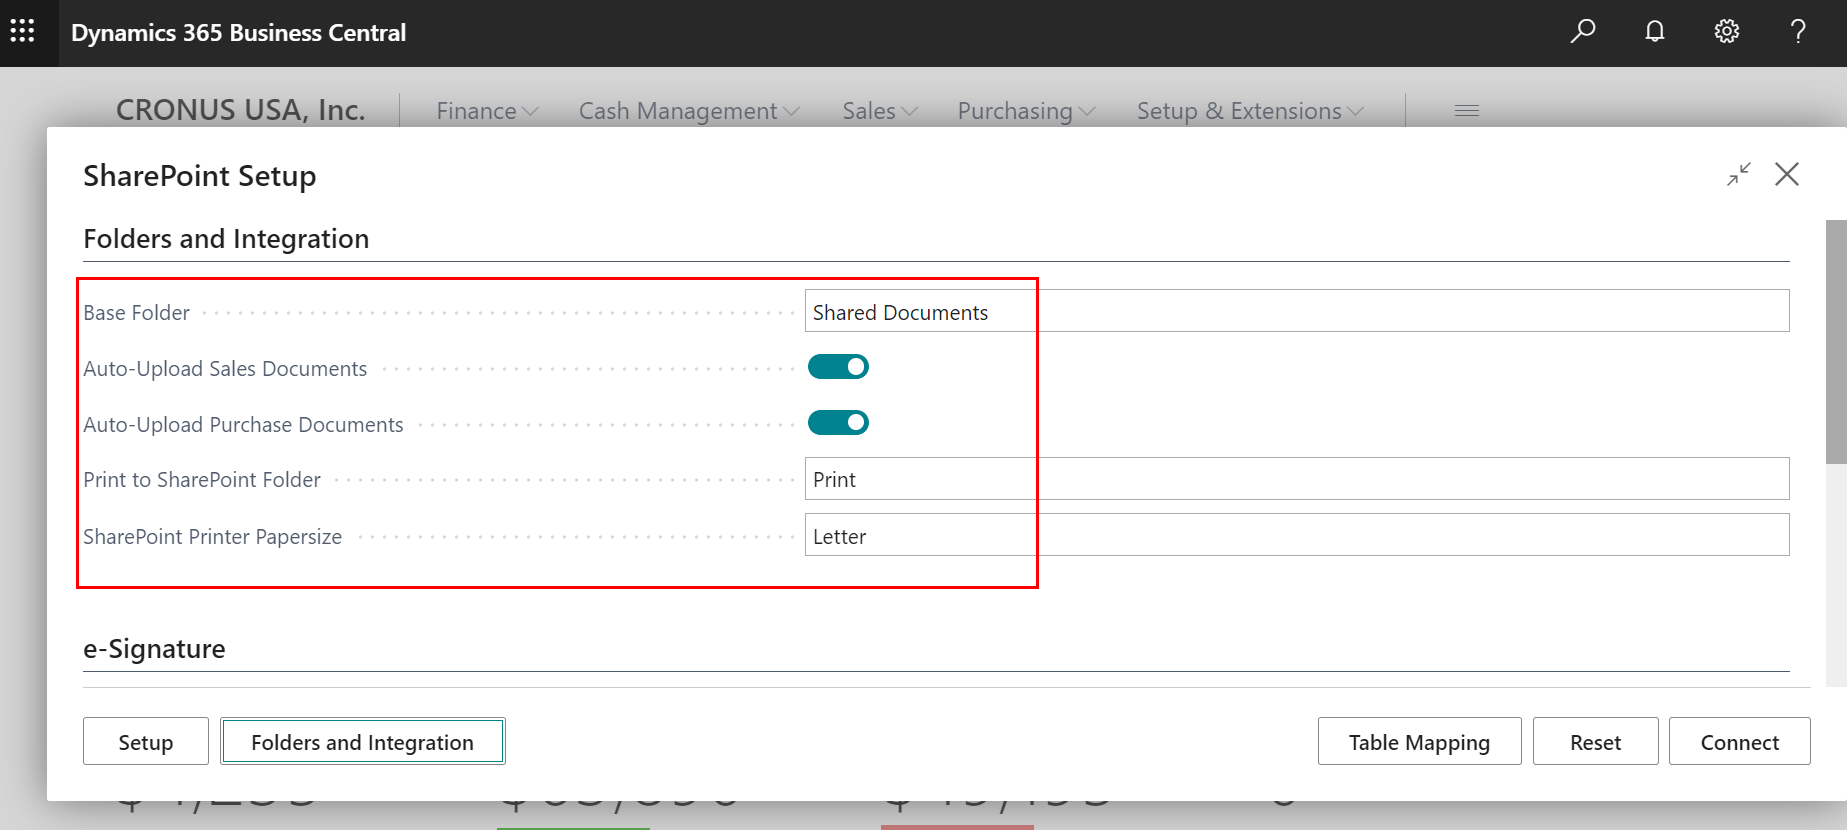
STEP 13: The folder and integration can be changed if required
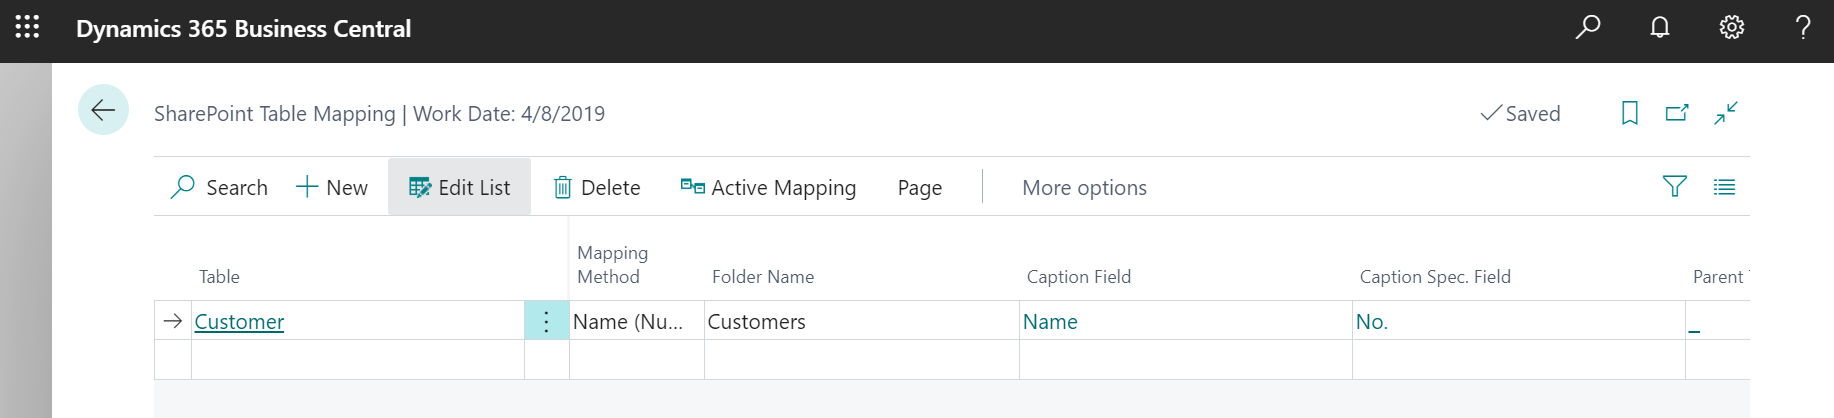
STEP 14: Click on table mapping in the setup and opt the table that is to be connected with the SharePoint
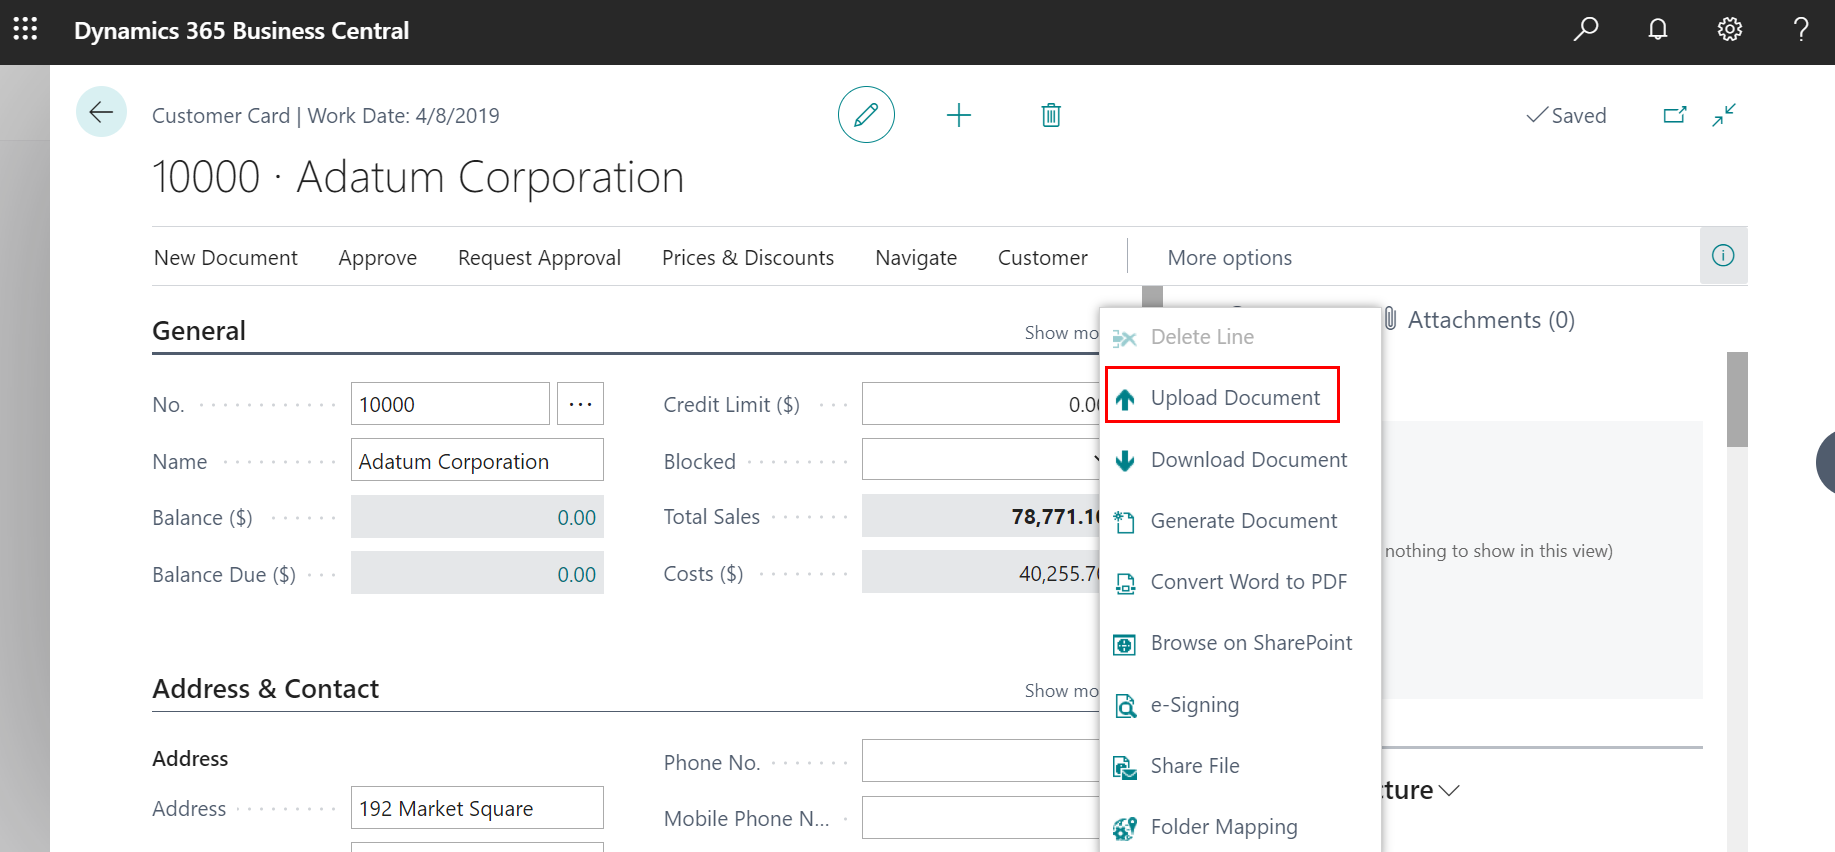
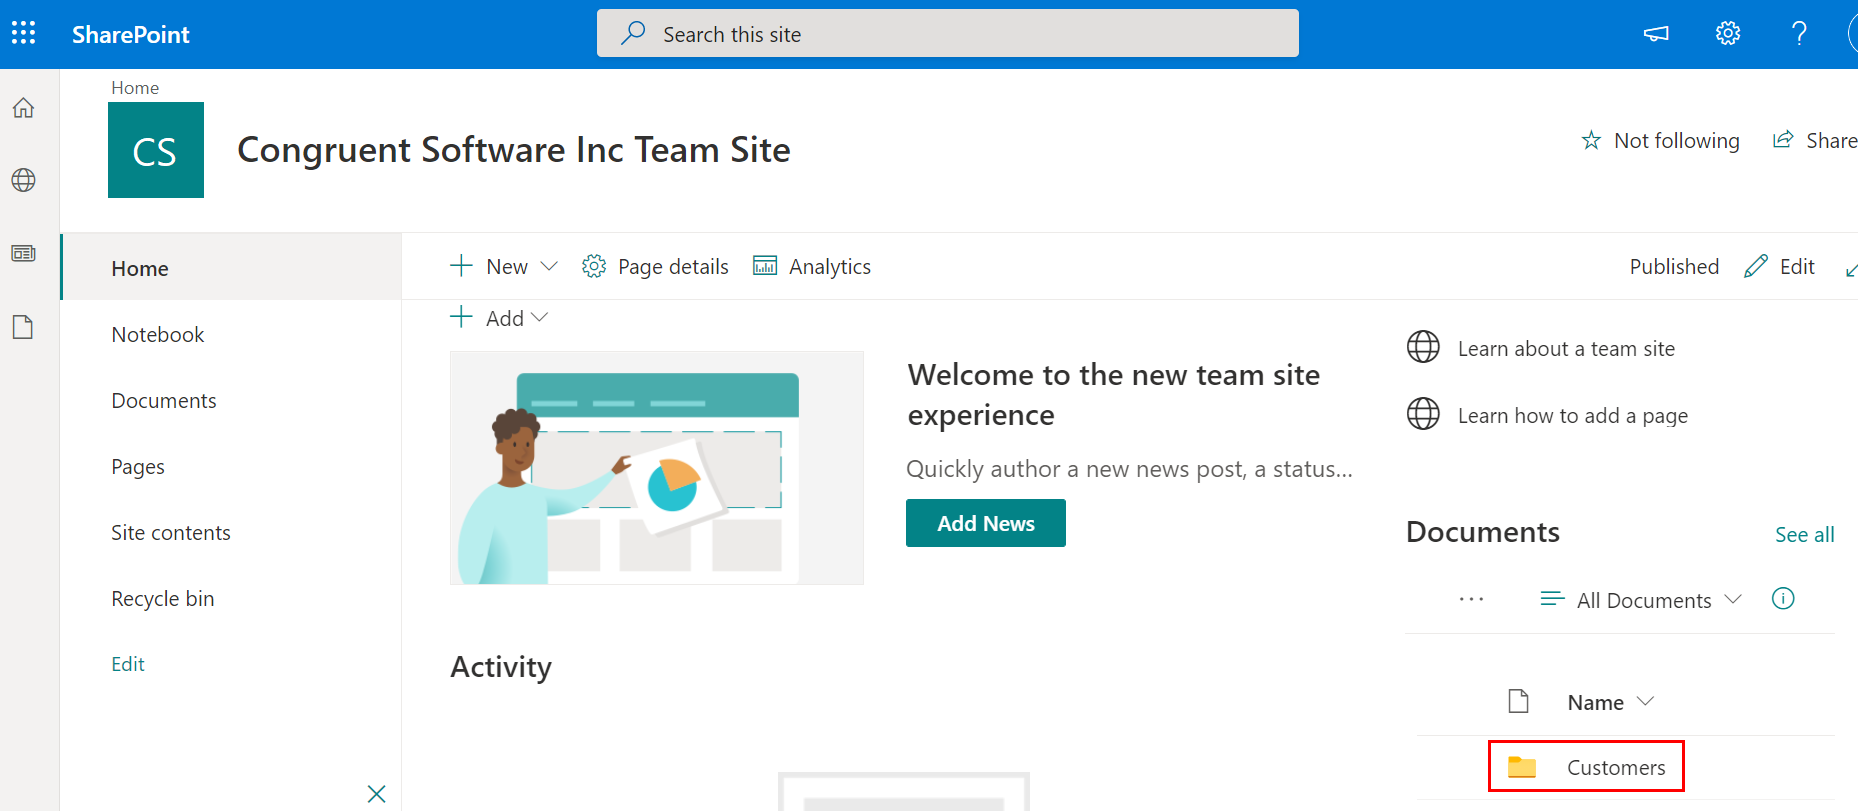
STEP 15: Look for the table that is mapped with SharePoint. Open the record to view the SharePoint connection in the factbox area of the table. On uploading the attachment in Business central, the document or attachments can be viewed in the SharePoint
Contact us to know more about our Dynamics 365 Business Central services.