How To Add A Workspace In Dynamics 365 Finance And Operations
Published on August 10, 2018
- Dynamics 365 Finance and Operations introduces the idea of workspace with features containing specific content for different roles within an organization
- Workspaces (Dashboard) in Dynamics 365 can be personalized to create your own workspaces or you can personalize the existing workspaces like work center with data, reports and transaction.
- It has been designed to improve efficiency and productivity of users in performing their day-today tasks.
Creating workspace without code
- Navigate to the dashboard segment, right click on workspace area and select “Personalize”.
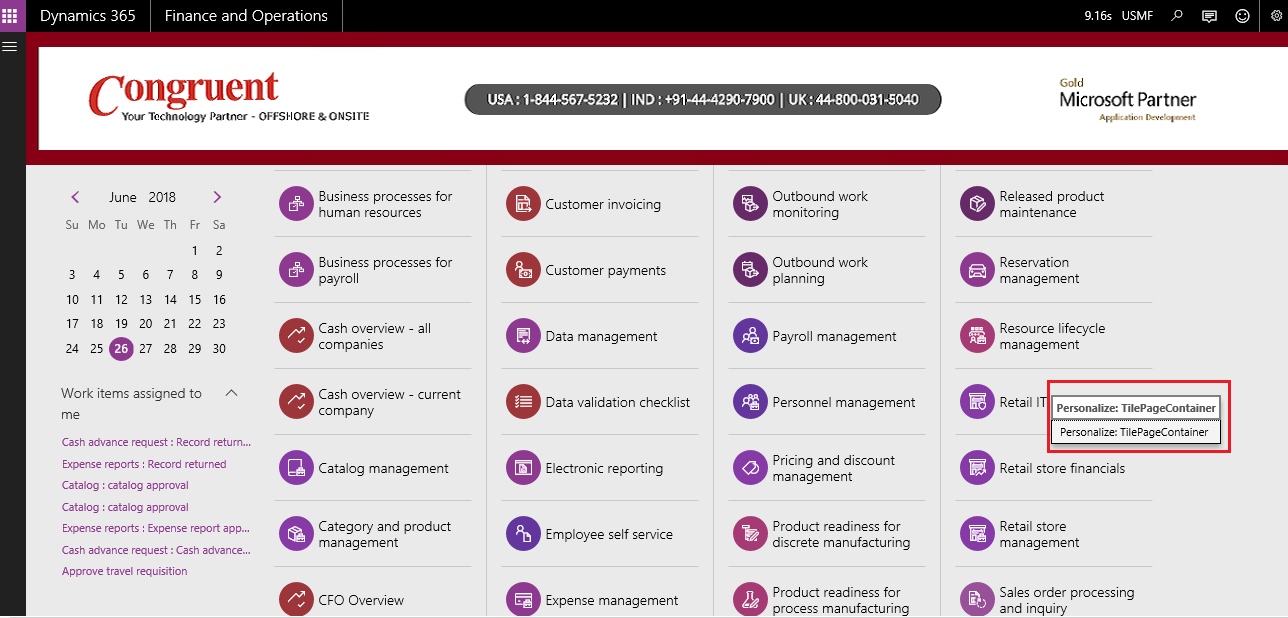
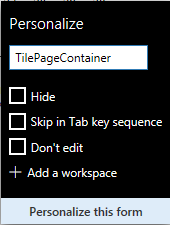
- The “Personalize” segment opens with a list of checkboxes. Choose “Add a Workspace” from the list.
- A new workspace tile “My Workspace 1” is created automatically in the dashboard.

- To edit the name of the workspace, right click on the tile “My Workspace 1” and select “personalize”. Rename it as “Customers count” and create some items in the workspace.
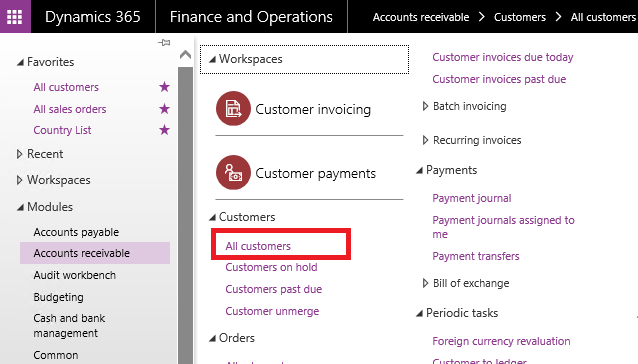
- Navigate to ‘Accounts Receivable’ segment and under Customers, choose “All Customers”
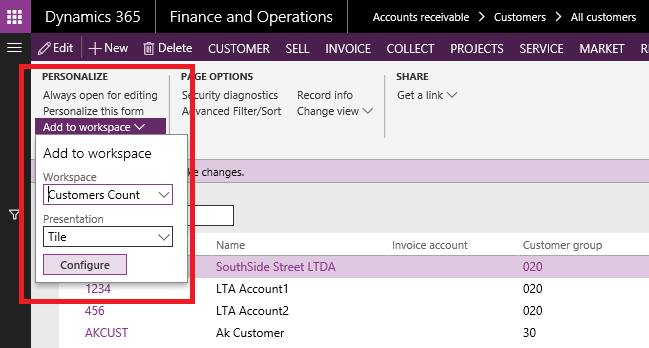
- Under Action Pane, select the “Options” tab. From the Personalize segment, click “Add to workspace”.

- A drop-down list opens, with workspace and presentation menus. Under “workspace” group, select Customers count and choose the presentation style as Tile. Click “Configure” to add the workspace.
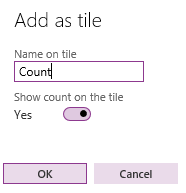
- A pop-up window entitled “Add as tile” appears. Under ‘name on tile’ tab enter Count and activate Show count on the tile to “Yes”. Click “Ok” which creates your workspace successfully.
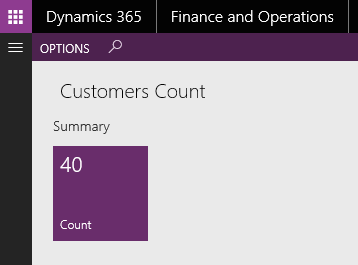
- To get the required details of the customer in the workspace, navigate to the home screen and select “Customers Count”. This displays the count of customers in the custom workspace.
Check our Dynamics 365 services to know how we can help you.