Purchasing Process Flow In Dynamics 365 For Finance & Operations
Published on June 27, 2018
A purchase order (PO) is an invoice created while adding inventory to a warehouse such that all the details of a transaction are recorded for further references. These receipts/invoices are also helpful when a product is to be purchased for selling it to a customer in a work order. Purchasing in Microsoft Dynamics 365 helps the organization by providing an overall view of available orders, how to modify orders and further help in the accounting of invoices.
Purchasing order features in Microsoft Dynamics 365:
- Enter and process product and service purchase orders
- Manage receipts/ Vendor invoices associated with purchase orders (when products are received or services are performed)
There are three types of purchase orders that can be created in Microsoft Dynamics 365.
- Journal: It is used to create a draft order, which is not recorded while master scheduling. Journal type POs do not alter the quantity of stock and do not generate inventory transactions.
- Purchase order: These are the most-often used POs which stores information when the order has been assured with a vendor, which are further processed through invoices/receipts before the payment is made to the vendor.
- Returned order: It is used when goods are to be returned to the vendor. The order lines should have negative quantities and while accepting the goods, you should mention the return material authorization (RMA) number on the General tab of the PO which was provided by the vendor.
The following section gives an elaborate study on creating a Purchase Order in Dynamics 365 Finance and Operations edition.
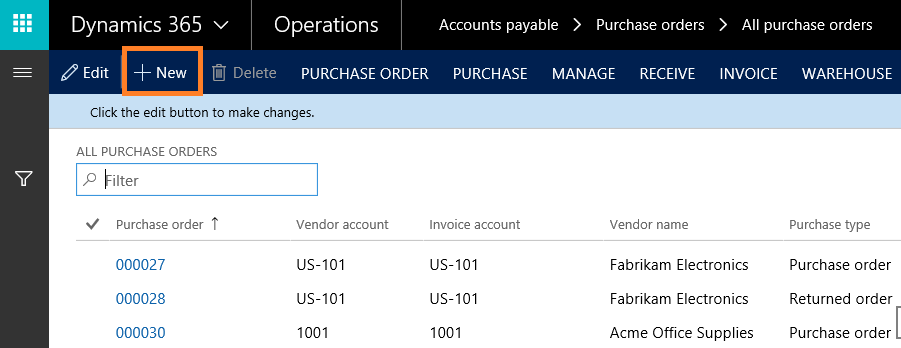
- Purchase order creation: From Dynamics 365 Operations edition select “Accounts payable” module. In that section chose Purchase order followed by “All Purchase order” and select “New Tab”
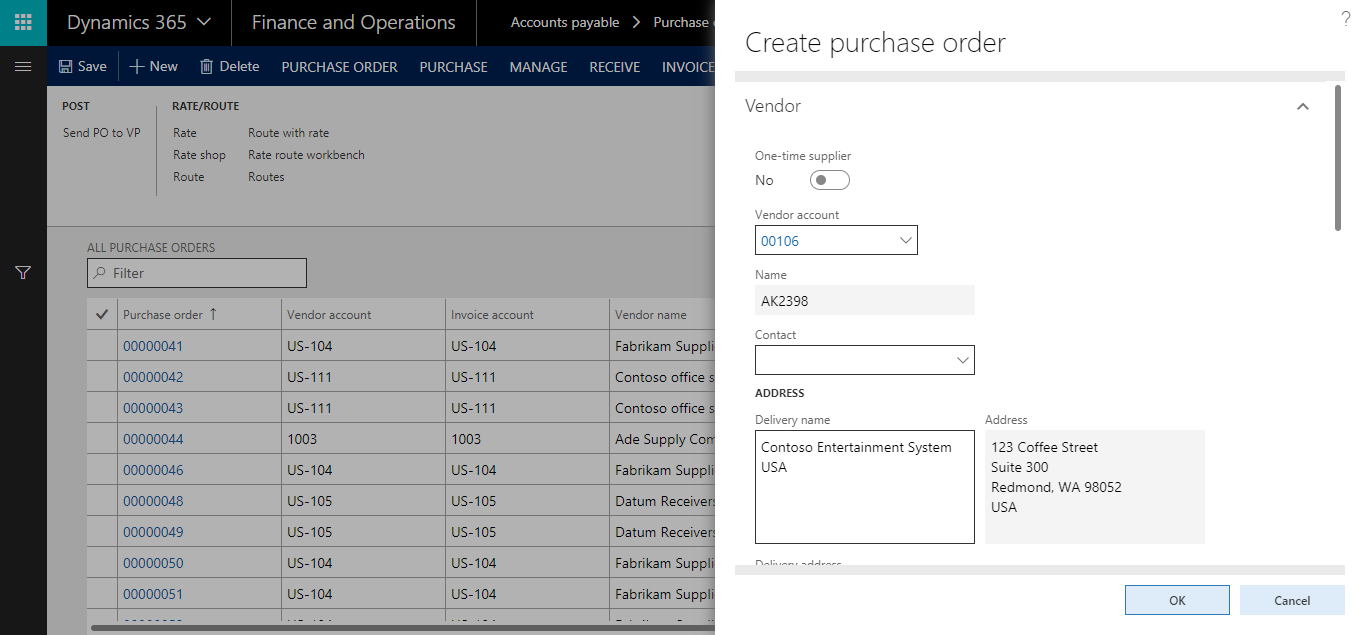
- Enter the vendor account and fill out the relevant information in applicable fields and submit your information.
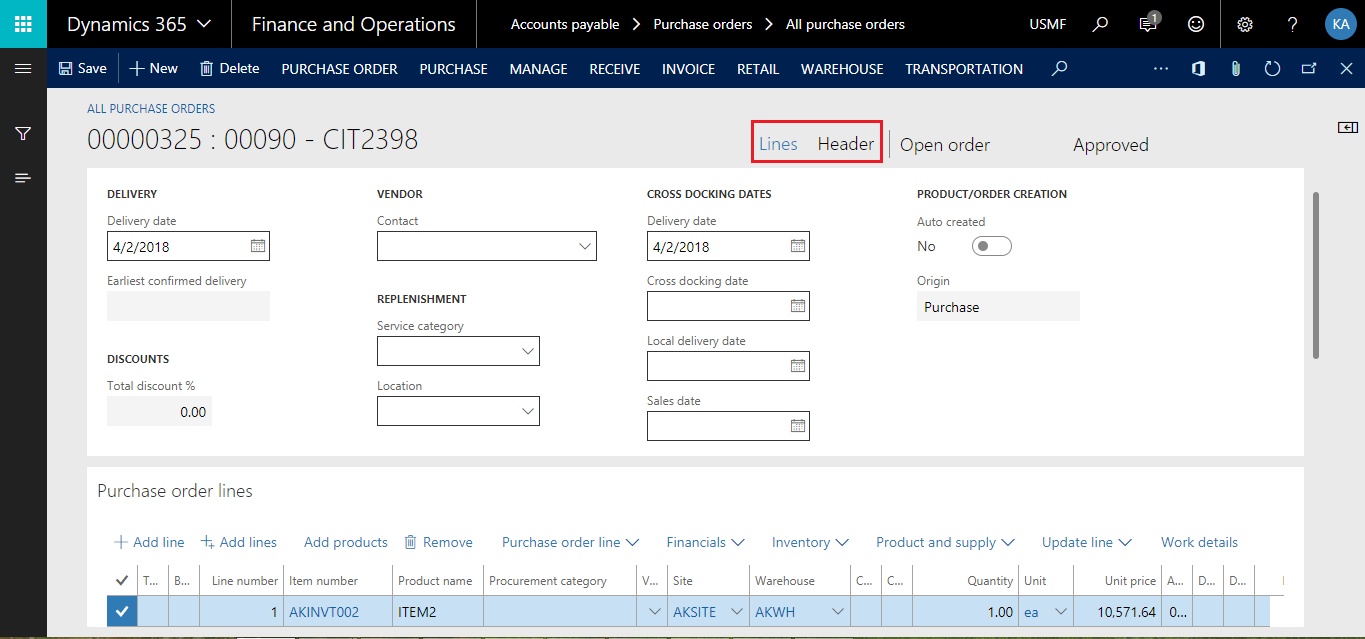
- The purchase order header is created. Purchase order form has two icons called Header view and Line view. Enter the relevant header and line information.
- Confirming purchase order: In order to confirm a purchase order, go to Purchase in action pane and click Confirmation under generate group, to confirm the purchase order.

- Viewing order confirmation: From Purchase tab in the action pane choose Purchase order confirmations in journals group to get a preview/print-view of the order confirmation.

- Posting receipt list: Under Receive tab in action pane select Receipts list. Confirm information and click OK, the Purchase Order Receipt list will be posted.

- Receipt List Preview: Select the Receive tab in action pane and choose Receipt lists in journals group and click Preview/print to view the receipt list.

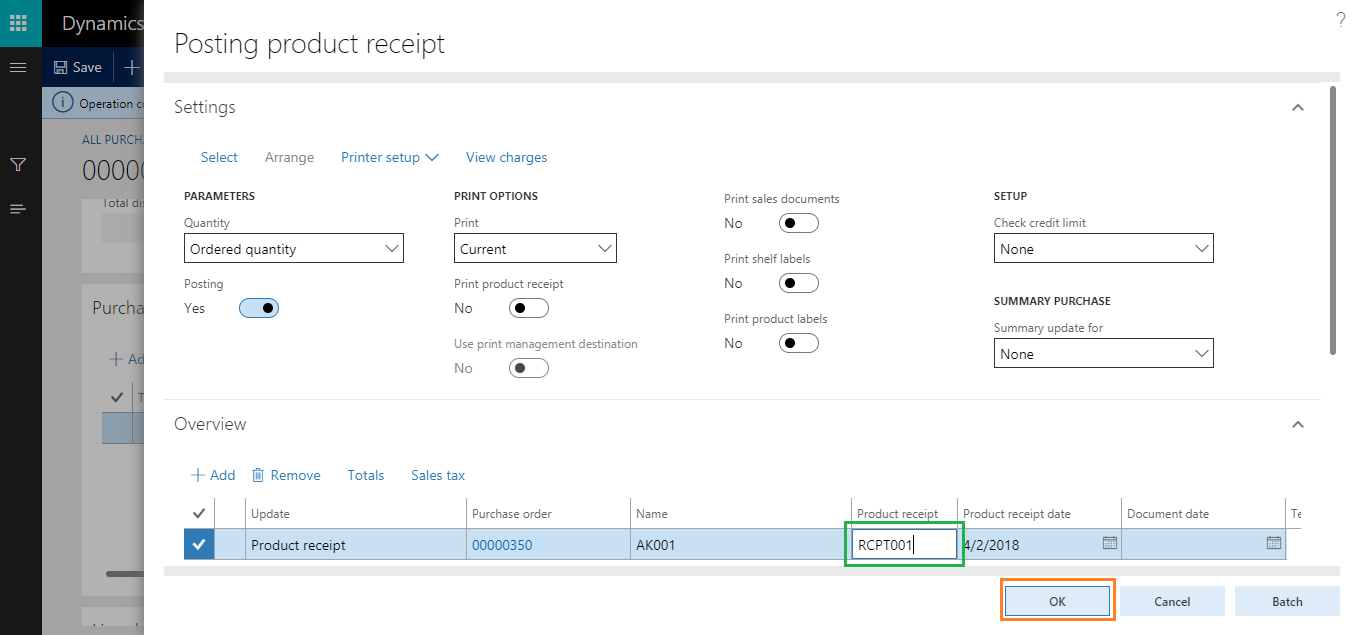
- Post product receipt preview: Under Receive tab in Action pane, click Product receipt. The Posting Product receipt form opens where you can enter related numbers in Product receipt field and then click Ok to submit.
- Viewing product receipt: Under Receive tab in action pane, choose Product Receipt in the journal group. The Product receipt opens where you can Preview/Print the receipt.

- Generating invoices: Under Invoice tab in action pane, select Invoice.

Vendor Invoice form opens, where you can enter invoice information. Select Match Product receipts followed by update match status. Finally, click Post in action pane to submit your information.
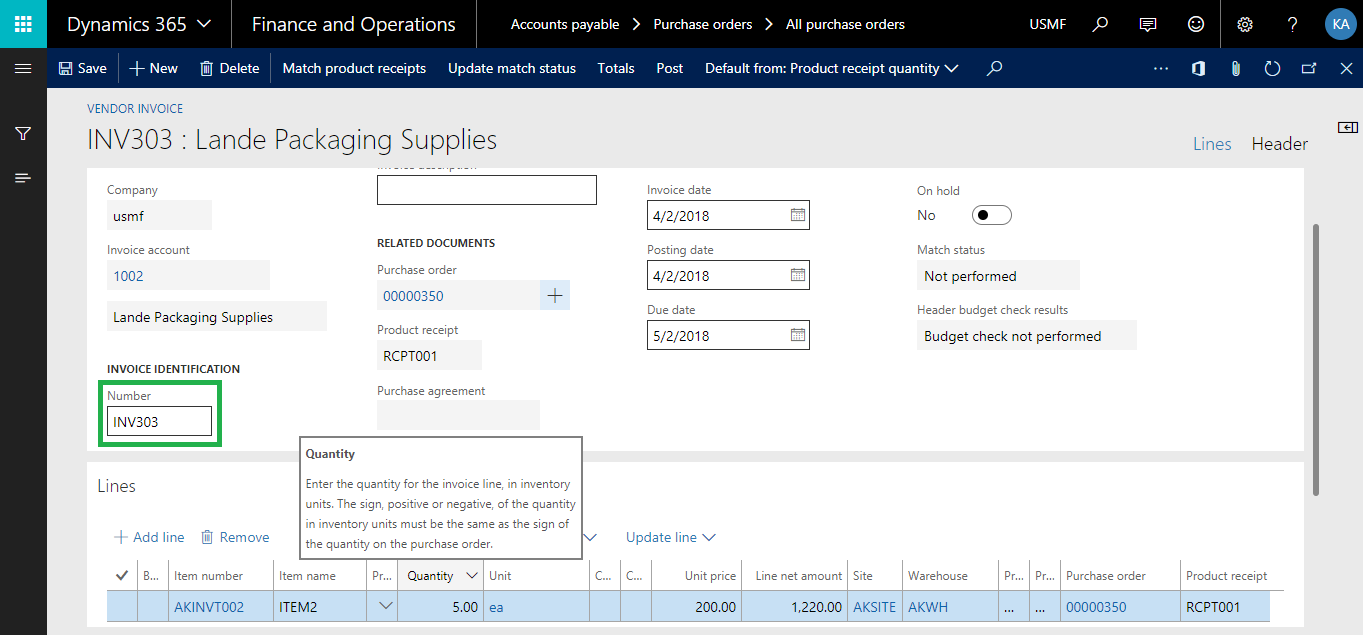
- Print preview of Invoice. Open Invoice tab on action pane and select an Invoice option in Journals group. When the invoice journal form is opened, under overview tab, click Preview/ Print and choose Copy/original invoice.

- Invoice posting: In accounts payable module under Payments Tab, click payment journal. After a new journal opens with a batch number created automatically, select the name as “Vend Pay”
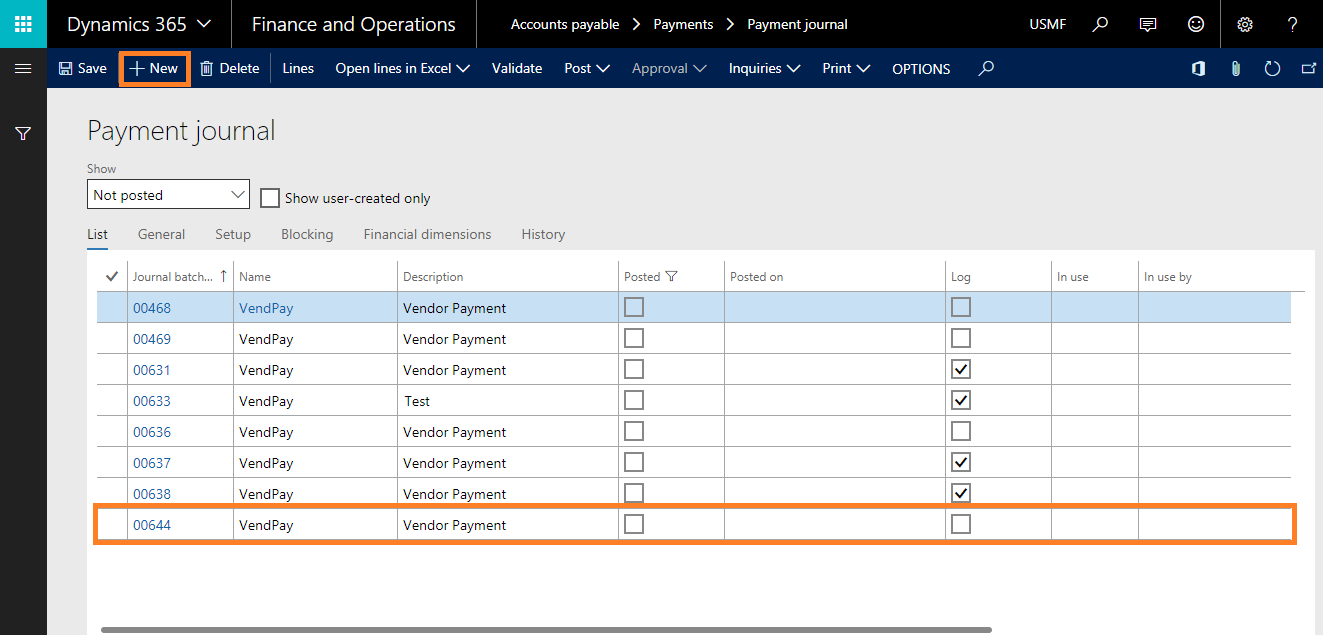
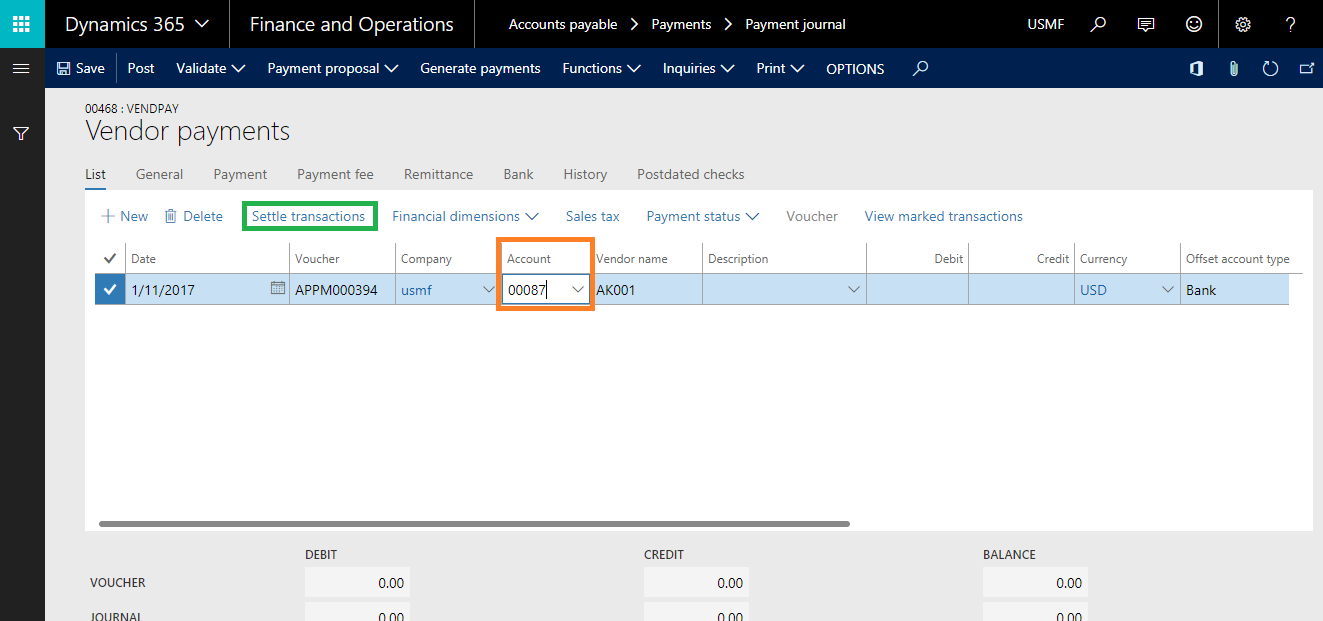
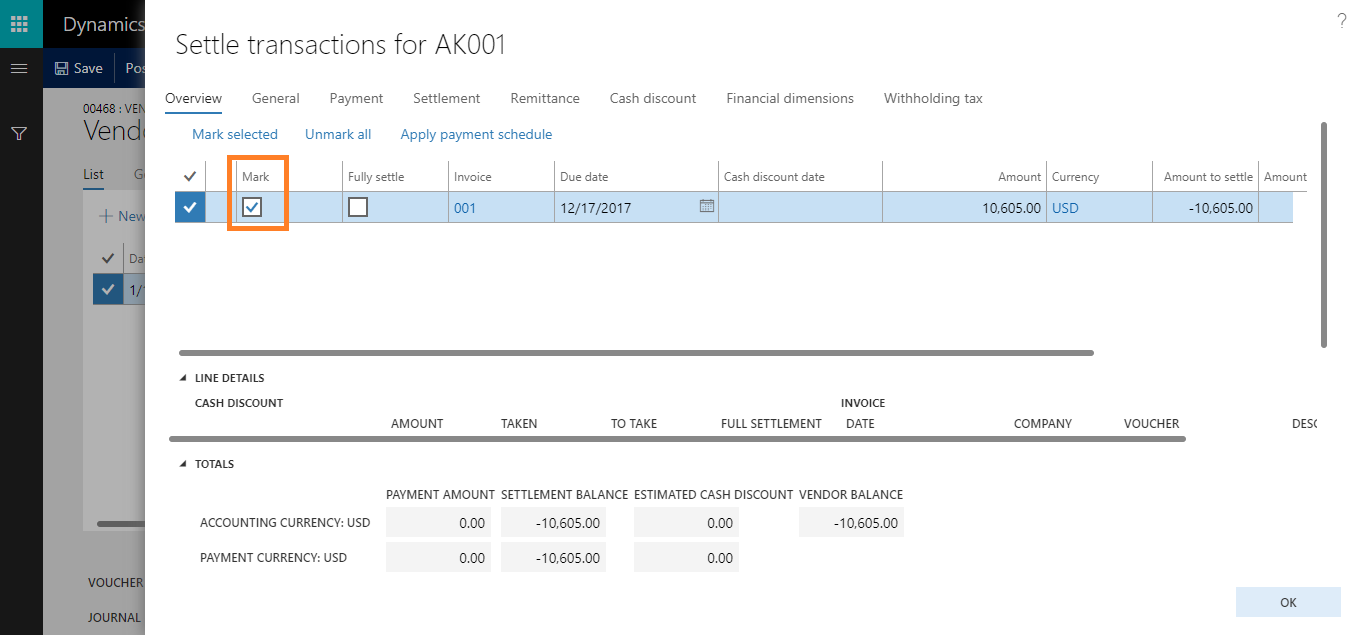
- Validating & posting a voucher In the action pane selecting Click Lines will generate a voucher number automatically for payment. Enter the vendor account then select settle transaction, which will show the relevant invoice for the vendor.
Select the invoice and click ok, the invoice amount will be added in the payment screen.
- Under Payments section select the offset account, the method of payment, and payment status as “Approved”
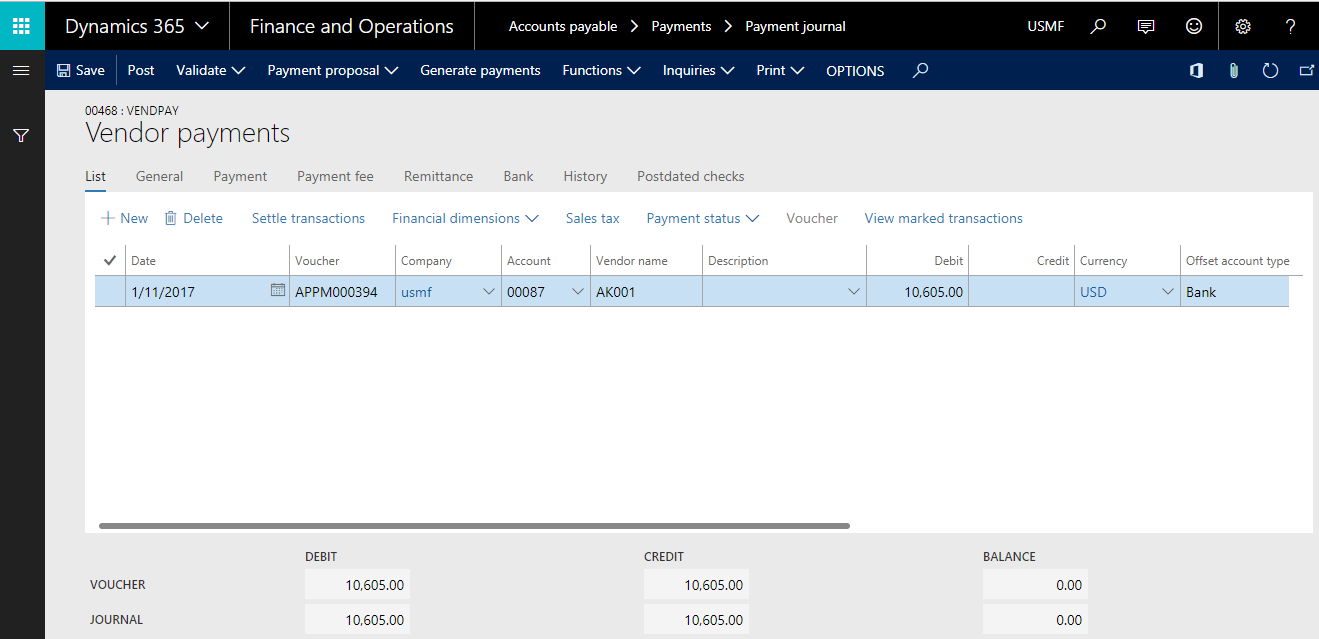
In the action pane Click Validate. This validates the purchase operation and a message pops out which explains as the operation is completed and the journal is verified.
- Finally, in the action pane Click Post. After validating and posting the journal, a message will be displayed as “Voucher posted to the journal”. This concludes the purchasing process flow in Dynamics 365.
Contact us to know more about our Dynamics 365 services.